
Learning how to hatch chicken eggs without an incubator is easier than you might think at first. Even without a broody hen or an incubator hiding in your garage, there are many DIY projects to consider. Let’s take a look at some of the best ways you can hatch eggs without a store-bought incubator.
Finding a Broody Hen
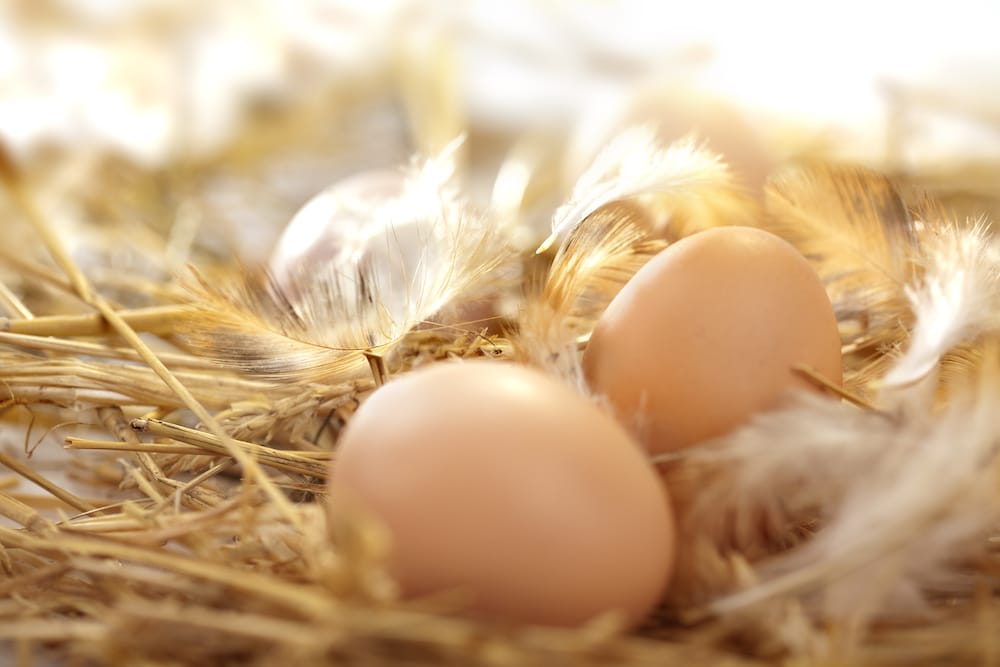
By far, the best option for hatching your eggs is to put them in the care of a broody hen. Any hen that’s currently sitting on a nest will be willing to take your fertile eggs underneath her. Using this step, all you do is place the eggs in the nest, and the hen will nurse them until they hatch.
There’s no doubt that this is the most cost and time-effective choice, as nature handles the process for you. However, the most significant issue is that many hens have had their motherly instincts bred out of them. The majority of species will walk away from their eggs right before they hatch, which is when you’ll need an incubator.
If you’re not able to find a manufactured incubator, there’s no need to panic! Using a few household items, you can quickly whip up one of your own that your chickens will love.
How To Make a Homemade Chicken Egg Incubator
There are four main steps you’ll need to follow to make sure your eggs hatch:
- You must keep the eggs at 99.5 degrees Fahrenheit or 37.5 degrees Celsius.
- You must turn the eggs three to five times daily.
- The humidity in the incubator should be held at 45% for days one through 18.
- The moisture should shift to 60 to 70% between days 19 and 22.
As long as you can ensure you follow these four steps, your eggs are bound to hatch healthily. Fortunately, the care instructions are relatively lax, which means you can craft your own incubator in under an hour. Even if you don’t have these items lying around the house, they’re inexpensive to source from the dollar store.
Steps To Make a DIY Incubator
For this project, you’re going to need the following:
- Plastic storage bin and its lid
- Incandescent flexible lamp
- Spray bottle
- Drill
- Cloth towel
- Thermometer
- Hemp bedding
Step #1: Prepare the Plastic Bin for Ventilation
The first step of your project is to prepare the plastic bin to be comfortable and has enough ventilation. When buying a plastic bin, make sure you choose a side that’s large enough for all of your eggs to lie flat. You’ll also need to find one that’s large enough to house the head of the flexible incandescent lamp you’ve chosen.
When preparing the bin for ventilation, you’ll be working with the lid and your drill. You’ll want to drill 3/8†holes across the lid’s surface at even intervals, so there’s plenty of airflow. Once you have your airflow managed, you can then begin setting up the inside of the bin for your eggs.
Step #2: Make the Bin Comfortable
For this step, you want to make sure the inside of your bin is ready to retain enough heat. Remember, you don’t want your eggs to start cooking, but they should have enough warmth to hatch.
Place a single layer of hemp bedding along the bottom of the bin and then place a cloth towel on top. This process should provide enough insulation to maintain an adequate temperature for all your eggs.
Once you finish this step, you can then place your lamp inside the bin. It’s important to make sure the lamp doesn’t have any structural defects, such as loose wires, to prevent fire hazards.
Step #3: Determine Egg Placement
With the inside of your incubator arranged, it’s time to consider where you’re going to put your eggs. Ideally, the eggs shouldn’t be too far away from how you have your lamp angled. If you find some areas of the bin not covered by the lamp’s light, you’ll need to purchase a second lamp.
To test egg placement, test the surface temperature of your bin once the light has been turned on. You’re going to want to make sure your egg’s surface temperature is at 99.5 degrees Fahrenheit. If you’re not getting the surface temperatures you need, you’ll either need a stronger bulb or a second lamp.
Step #4: Wait 24 Hours
Much like when you add fish to their new tank, you need to give your incubator time to reach the best temperature. Even though it might be tempting to put your eggs in right away, all of your equipment needs to be on for at least 24 hours. This process will give you a good idea if you need more heat or any power concerns with the setup.
Step #5: Begin Adding the Eggs
At this point, your at-home incubator should be ready to go, and you can begin placing your eggs. Spread them out evenly across the cloth lining the bottom of your bin.
Our recommendation is to mark each of your eggs with an “X†or an “O†using a permanent marker. This step helps ensure that as you turn your eggs, you can keep track of which have been turned at specific intervals. Otherwise, it can be challenging to keep track of which ones you’ve turned.
When you have all of your eggs placed, simply put the lid on top of the bin and allow your eggs to begin incubating.

How To Care for Eggs Without an Incubator
With your DIY incubator working its hardest to keep your eggs comfortable and safe, it’s time for you to become their hen. Managing your eggs is the most crucial part of hatching healthy chicks, and these steps are essential.
1. Wash Your Hands Regularly
When you’re handling your eggs, you must wash your hands regularly. This step is particularly important after you’ve finished handling them, as they could be loaded with bacteria.
One of the most significant concerns with eggs is Salmonella, a bacteria that can cause significant human health issues.
2. Be Gentle
It’s important to remember that there are living creatures inside your eggs, so a gentle hand is essential. Not only will you want to avoid disturbing the hatching process, but you also cannot damage their shells.
When turning your eggs, do so slowly and carefully, so the shells remain intact until it comes time for hatching.
3. Maintain the Humidity
Having a good humidity level in your incubator is the key to successful hatching. Your enclosure should have a humidity level between 40% and 50% for the first 18 days. This can easily be managed with your spray bottle, as you gently mist the top of your eggs as needed.
With proper humidity levels, your eggs will have enough fluid available to them to produce an air bubble on their shell. This bubble will help them to poke their heads through to breathe later in their development. It’s also essential to make sure you don’t have too much humidity, which could cause them to drown.
After 18 days, you should increase the humidity in the incubator to 60% or 70%. These levels help ensure the egg membrane doesn’t dry out when it comes time for hatching.
4. Maintain the Temperature
The other essential part of hatching eggs is making sure they stay warm enough. As mentioned, the enclosure should have at 99.5 degrees Fahrenheit for the entire 21 days they take to hatch. If your eggs get exposed to fluctuating temperatures, it can cause the chicks to die prematurely.
5. Turn the Eggs Regularly
Always make sure you take the time out of your day to turn the eggs to develop correctly. This step is when a broody hen is most useful, as she does the job for you. However, since you’re the hen in this scenario, turn your eggs three times every 24 hours.
How To Hatch Chicken Eggs Without an Incubator: Final Thoughts
When you’re mastering how to hatch chicken eggs without an incubator, the process is relatively straightforward. As long as you take care of their hatching environment and regularly check on the eggs, their development will be swift.
Contents