
How to make an egg incubator?
by Jennifer Behm Chicken farmer| Last Updated 16 March 2023
Do you own a poultry farm, or are you considering one? Even with live chickens in a coop, there could be times that you'll need some help hatching the eggs with an incubator. If you are worried about the fact that no broody hen is available and still want healthy hatching for the eggs, you can always take on a new endeavor preparing a homemade DIY incubator.
You might ask, will it work? The answer could depend on the kind of chicken incubator you end up making and how efficient it is when it is completely set up. Plenty of people successfully make chicken egg incubators that work and provide the eggs with just the right amount of heat, humidity, and other necessary conditions for healthy, perfect chicks to come out of the eggs.
Read on:
- What you will need to make a chicken incubator?
- DIY incubator – step by step instructions
- Day 21 chicken egg incubating
Another aspect that it could solve is your budget. You won't have to worry about the chicken incubator burning a hole in your pocket if the incubating equipment is made from everyday use things and is not very expensive – which is the purpose of a DIY incubator.
While you can be satisfied with the fact that you put your regular waste to some good use, it is important to know that this incubator needs to be set up properly, or the chicks might never hatch out from the eggs. If it does work, it would a great innovation on your end. So why not try, right? Read on to find out what all will you need and how will you need to proceed with making your own homemade egg incubator!
What you will need to make a chicken incubator?
Very naturally, you might not have everything on hand while starting to make this DIY incubator and it is always nice to draw up a list so that we know what we do and don’t have out of the list and why and when would we need them. Therefore, here are a few things that you would need for making your homemade egg incubator.
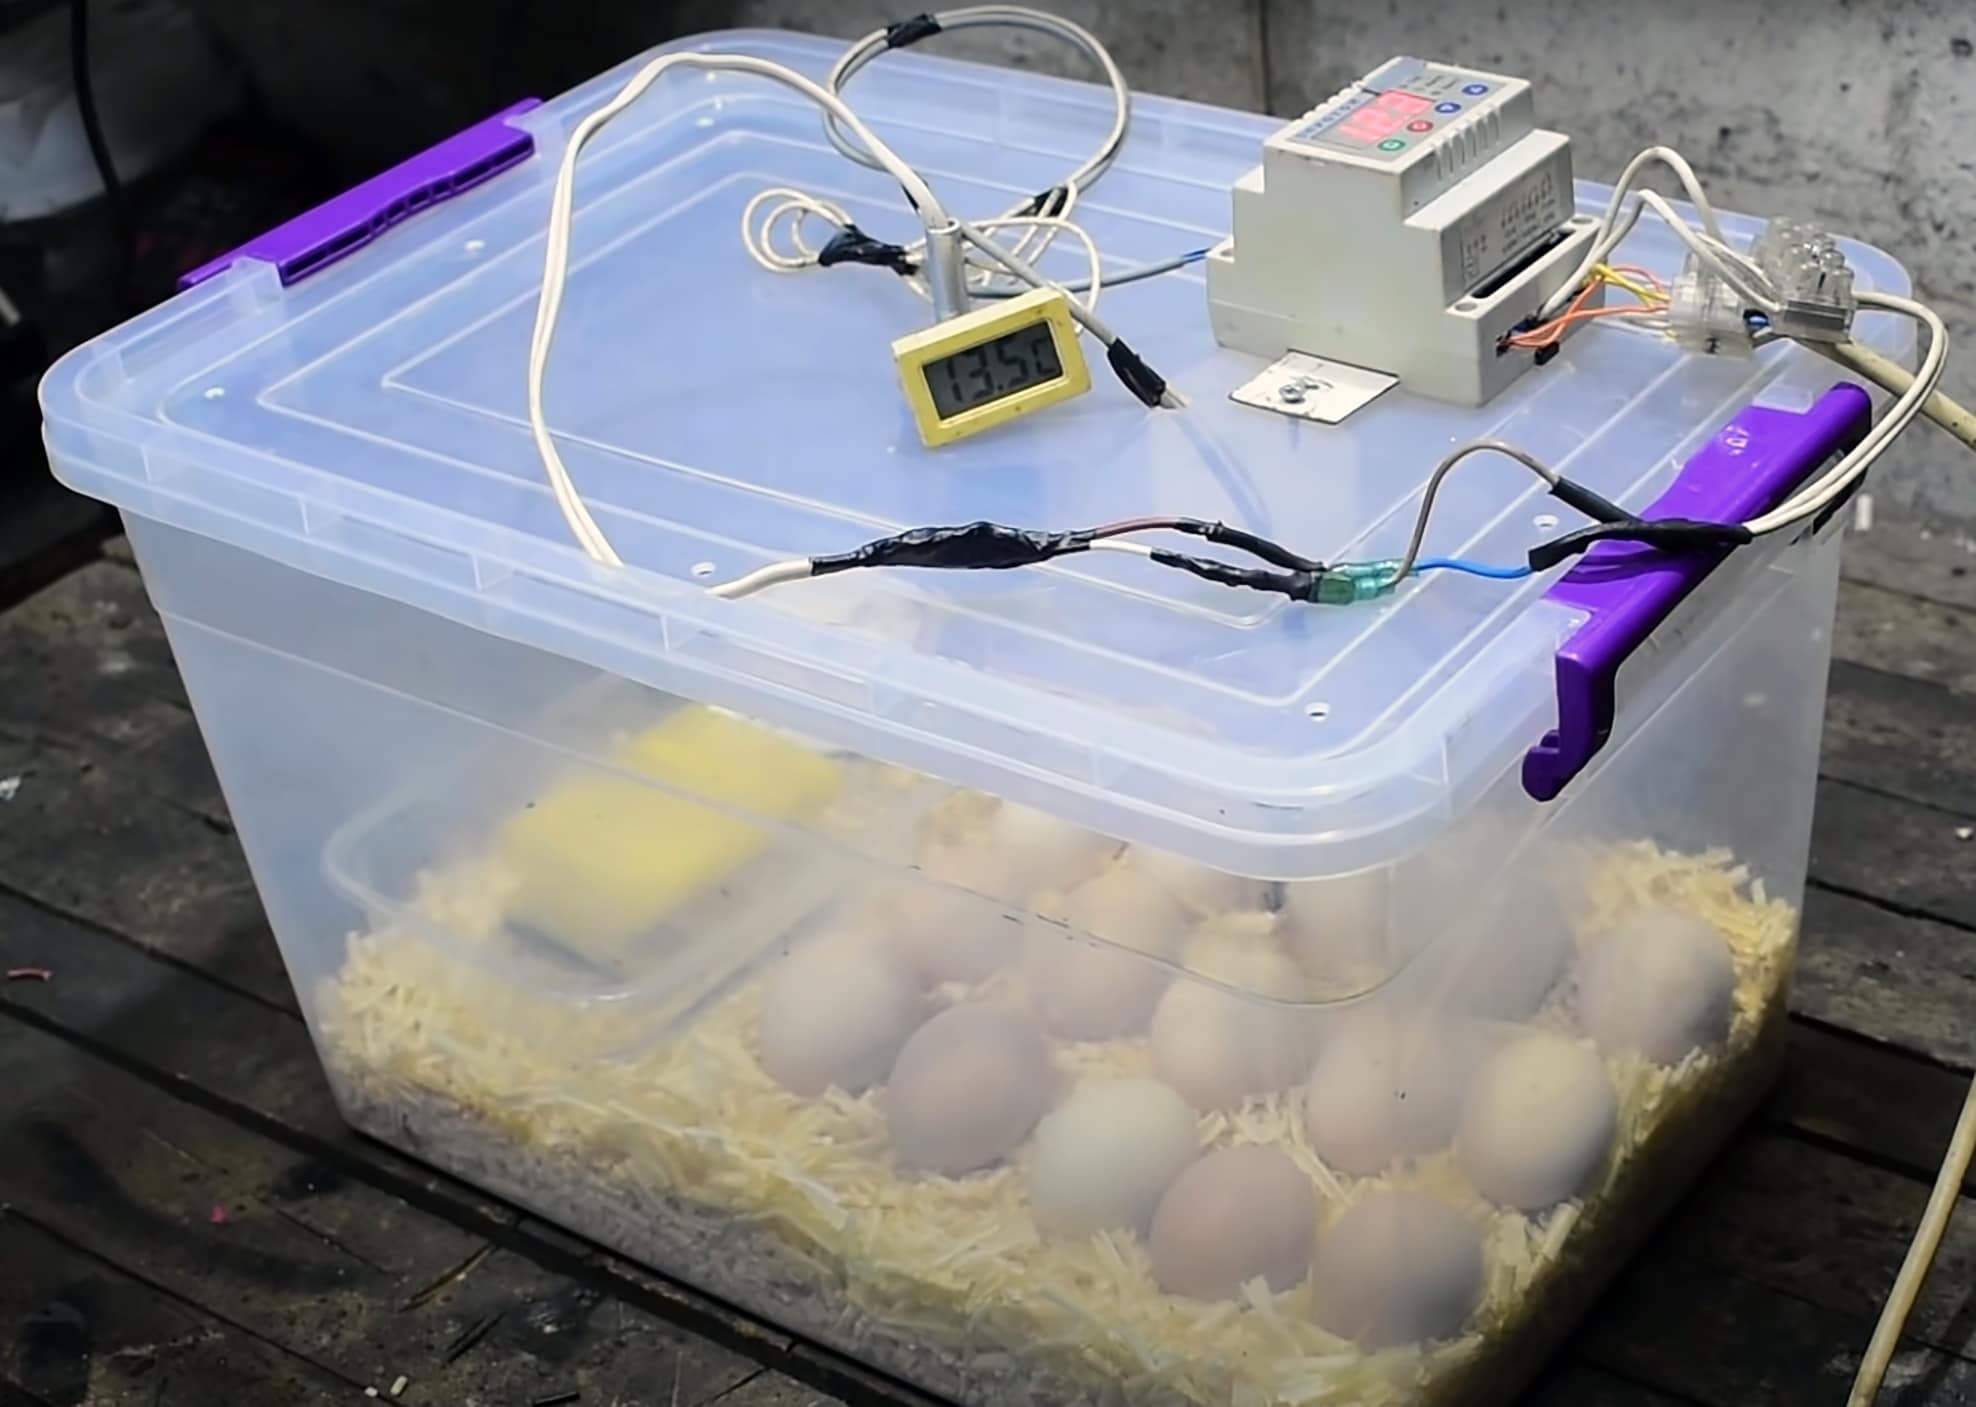
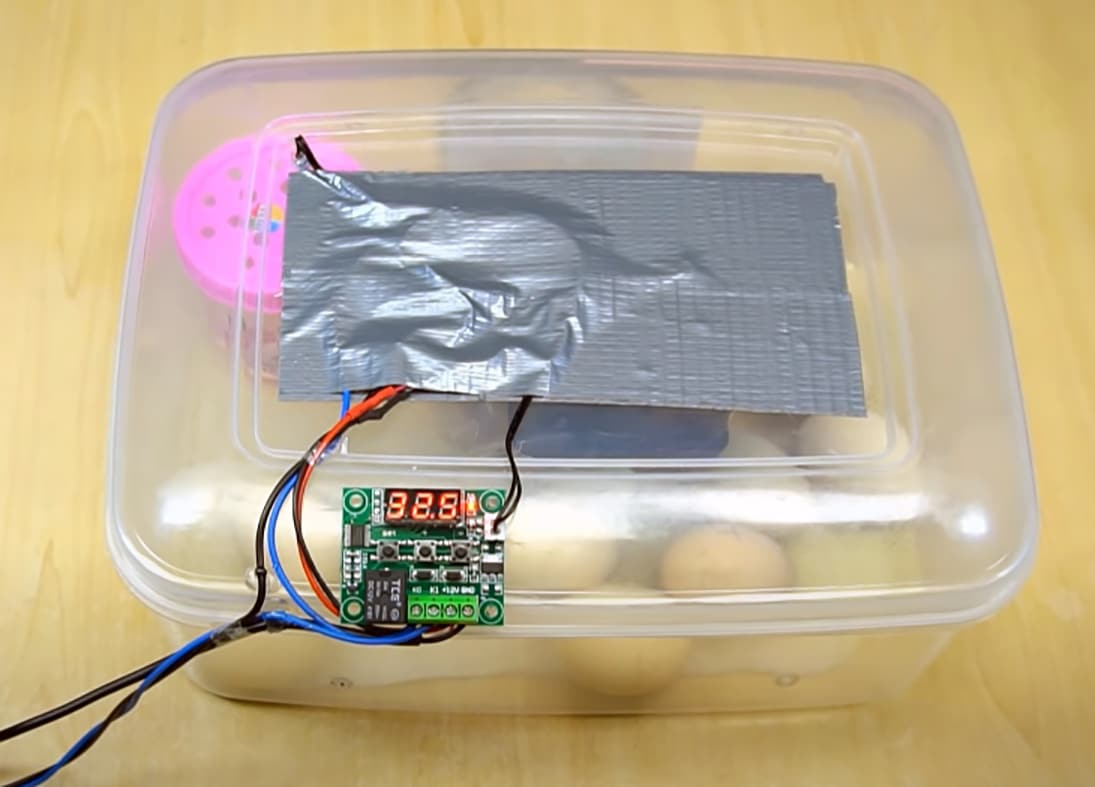
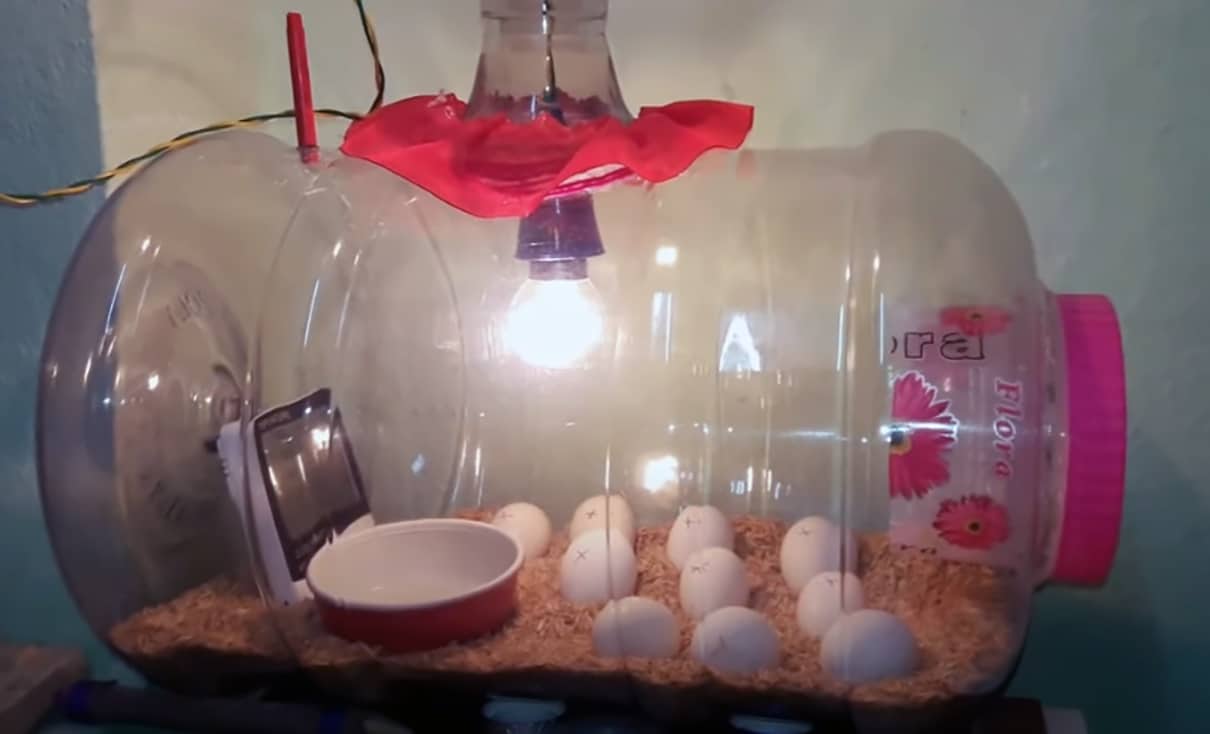
- Any glass container: First of all, you need a huge glass container for keeping your eggs. This container should have a good width as well as depth so that they are not at a very shallow depth. Without the right container, there's a chance of falling out or any other mishap could happen. The container should be insulated enough to maintain equal levels of heat and humidity to keep your eggs comfortable.
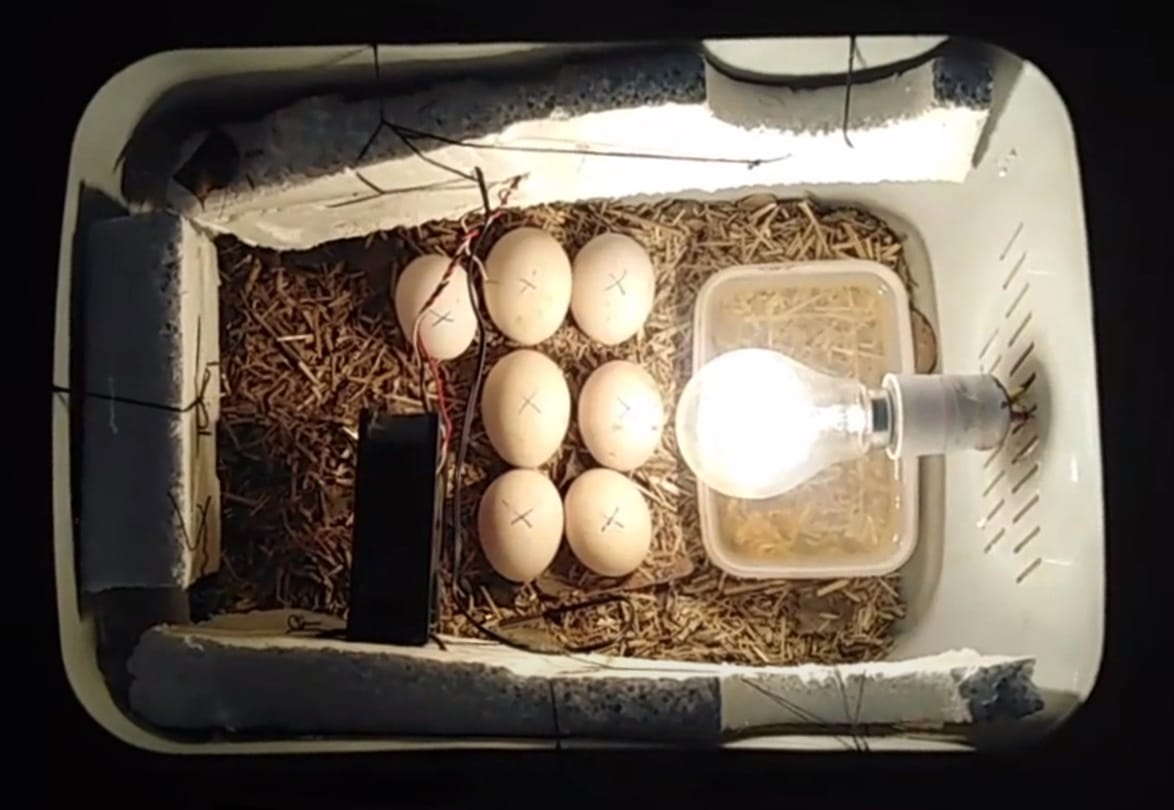
- Heating tools: Since you are trying to replicate what a hen would do to the eggs, you need a well-energized heating source so that your container can be well-heated for the eggs to have an optimum temperature for hatching. Use a 25-watt bulb attached to a stand and placed in a corner of the container. Meanwhile, reports also suggest that some people also use heating pads to do the trick but that may or may not fall through.
- Stones or pebbles: This element has two functions. First, it could make your container trap in more heat than it originally was. Also, it could add an aesthetic value to your homemade egg incubator. When the chicks successfully hatch out of the eggs, it also gives them an initial feel-good element. Therefore, you would need stones or pebbles and would need to drop some to the bottom of the container before placing the eggs in it.
- Mesh wire: You need a mesh wire to separate the heating element from the area where the eggs have been kept. While the eggs must get a proper level of heat to hatch, you don’t want to overdo it. Excessive heat might end up burning the eggs or the hatched chick, which is extremely dangerous. Depending upon what kind of container you use, the extra heat could be a potential threat to the container itself.
- Sponge and bowl of water: The sponge and water maintain the humidity inside the container. However, it could also pose a potential threat to the lives of the chicks as they could end up drowning in the water so where you decide to place the bowl full of water is of utmost importance. People often choose to place the bowl of water on the floor or the container, away from the eggs with the mesh wire covering it to avoid any potential mishaps.
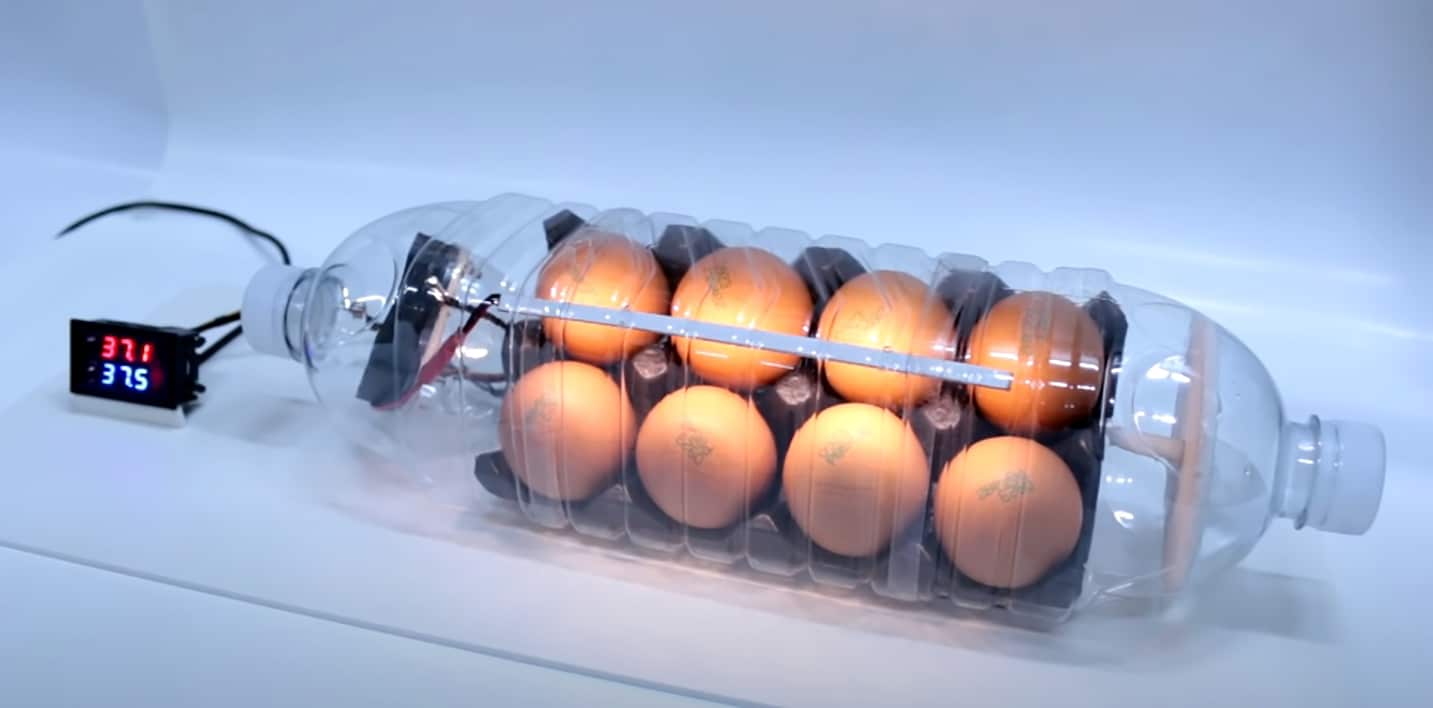
- Thermometer: Quite naturally, you wouldn't be able to study the temperature of the egg incubator just by looking at it. The best way to read the temperature would be to place it close to the eggs so that if the temperature is not right, you could quickly make the adjustments.
- Hygrometer: The hygrometer works much like the same way as a temperature, but it allows you to measure the humidity inside the incubator. It needs to be placed close to the eggs, ensuring that you can make appropriate adjustments wherever and whenever necessary.
- Computer fan: This fan is optional. However, people do use it in some models of the chicken incubators that they design. The computer fan would help regulate the temperature inside the chicken incubator – thus making it a more workable model to help the eggs hatch successfully.
With this list, you should be fully prepared to start creating your incubator. You can browse online or in stores for any substitutions that you might need to make. Let's now move forward to see how we could make the chicken incubator with all these products.
Read More from prestigequeen.com :
DIY incubator – step by step instructions
Now that you have everything you would need to make your chicken incubator, it is time to start building it. While some of you may find it extremely simple, it could be a little difficult for some others. Therefore, each step must be paid full and even extra attention to so that the end product comes out to be exactly what we want it to. The process involves both the pre-incubation and the incubation sequences.
STEP ONE: Cutting a hole in the container
First of all, you would need to make a hole in one wall of the container so that you can pass the 25-watt bulb through the hole and can set up your heating incubating equipment. It is important to remember that your container – whatever you decide to choose – should be a good insulator or it won't be able to handle and trap the heat and the purpose of a chicken incubator would be defeated.
STEP TWO: Fixing the wire mesh
Next up, you would need to fix up the wire mesh to separate your heat source from the area where you would be placing your eggs and where the chicks are expected to hatch out from the eggs. This is an important step as it would be saving your eggs and chicken from burning up. Another thing you could do is create a false bottom shelf for your container using the mesh. This would help you clean up the poop and other waste once the eggs hatch.
STEP THREE: Placing your thermometer and hygrometer
You would have to place the temperature checking and the humidity checking tools in the incubator on the side of the container where your eggs are. Doing so allows you to monitor the temperature and the humidity inside the container at all times. Since this is the main purpose of the chicken incubator, you would want both the tools are highly accurate so that you get an accurate picture of your chicken incubator.
STEP FOUR: Adding the bowl of water
While you are monitoring the temperature and humidity levels inside the container, it is also important that the humidity inside the container can be easily adjusted. For this, you would need to place a bowl of water in the container and would also need to add a sponge so that the quantity of water and eventually the humidity levels can be easily adjusted.
STEP FIVE: Adding the glass lid
You need to be able to monitor the process throughout. For this, you would need a viewing window on the top of the container. You will have to measure and cut the size of the window and then add the glass lid so that when you see from the top angle, you can view everything.
STEP SIX: Testing the incubator
Before adding any eggs to the incubator, always test what you've done. Turn the light on and arrange everything as you would just before adding the eggs. After this, you would have to leave the incubator like this for a day or two, while you closely monitor if there are things that need to be improved upon for the actual process. If there are lapses in the temperature inside the incubator, drill a few holes. If that makes the temperature too low, you would need to cover some holes with duct tape. You would need to do this unless and until you reach the optimum temperature.
STEP SEVEN: Adding fertilized eggs
The next step is to add your eggs. However, the kind of eggs that you choose to put in your incubator is also important. One thing to pay attention to is the fact that you absolutely cannot put the store-bought eggs into the incubator as they won't work at all. You would need to find fertilized eggs to put in the incubator. If you do not have a rooster or eggs yourself, you could contact your local farmers for the same.
Day 21 chicken egg incubating
Now that the initial phase of testing the incubator is complete and you have put in your eggs, the process does not stop here. The process has just begun. Now you would have to monitor your chicken incubator to make sure that everything is going as it should and that any adjustments that have to be made are made on time. Now, let us move to the second part of the process that would start after you add the eggs to the incubator. This would continue for the next 21 days until you hear the eggshells cracking and finally have chicks in the incubators.
Check for vitals
Your main focus is to keep the eggs healthy. Reports suggest that the chicken eggs would take 21 days to hatch. You should make sure to note the exact date when you put them in the incubator and for the next 21 days, you would have to keep checking the temperature and humidity levels inside the incubator.
Rotate the eggs: It is important to keep rotating the eggs at least three times a day so that both sides get an adequate amount of heat and humidity levels. For this purpose, you could mark the two sides of the eggs with different letters or symbols so that you know which side was last turned.
Candle the eggs
After a while, you would need to identify the living eggs and would need to remove the infertile ones from the incubator. This involves watching the eggs against the light and figuring out of you are watching a live or a dead embryo. A live embryo would look like a spit with blood veins coming out of it just like the rays of the sun while an infertile egg would show no such thing.
Listen for hatching sounds
This is the last but important part of the process. Around day 21, you would need to start listening to the crack sounds that might be coming from your eggs. It would mean that the chicks are pushing past the eggshell and are ready to hatch. In 12 to 24 hours, the chicks would have come out and your chicken incubator would have successfully solved its purpose.
The process might seem very long and tedious but if done right, your DIY chicken incubator could produce exceptional results. It could give the chicks an atmosphere that would only have been possible if the mother hen would have helped hatch the eggs. However, if the conditions are set right, it won't be impossible to impersonate these conditions.
Conclusion
I hope that the chicken incubator tutorial was not only a fun read but also gave you important insight into the whys and hows of it all. By now, it would have been clear that while it may sound like a tedious task to make a homemade chicken incubator, it won't be so difficult once you assemble whatever is needed and start working on it. However, it is important to take care of a few pre-incubation things as well.
The important thing is to focus on creating the right conditions as the chicks would need the same atmosphere that a hen sitting on them to help hatch the eggs would have provided them with. The right conditions are extremely important – which is why the temperature and humidity monitoring tools would be your main components in this case.
Another important thing to consider would be the kind of eggs that you put inside the incubator. Remember to only put fertilized eggs and not the store-bought eggs. If you don't have eggs or a rooster, do remember to contact your local farmers to help you with the eggs.
So, are you all ready to start making up your chicken incubator and help those little chicks hatch out with ease? What did you think of this tutorial? Was it helpful? Do tell us in the comment section below!
Read More from prestigequeen.com :
- Incubating & Hatching Eggs
- Everything you ever wanted to know about Eggs
- The best chicken BROODER box & heater
- Best Egg laying Chicken Breeds
References:
- Egg incubation en.wikipedia.org
- Incubator (egg) en.wikipedia.org
- How to Make a Simple Homemade Incubator for Chicks – www.wikihow.com
Contents