
How Do You Butcher Meat Chickens?
by Poultry farmer Miriam Rolling | Last Updated April 16 2023
IF YOU ARE RAISING MEAT birds they can be home dressed with a little skill
and persistence. Once you have killed and dressed a few broilers you'll be
surprised how quickly and easily it can be done. Killing a chicken and dressing it
is not for the faint-hearted. It does take a certain amount of grit to kill a chicken,
bleed it, and do the butchering work. However, the job isn't much different than
cleaning a fish or a duck shot during the hunting season.
You may want to have a commercial slaughterhouse do your broilers for you.
You could take the entire flock to the shop and have them commercially killed,
dressed, and frozen.
Poultry can be dressed at home with little or no special equipment. The
primary concern is sanitation. Use clean equipment and prevent contamination
of the carcass with fecal material or the contents of the crop or intestine.
All birds to be slaughtered should be fasted (no food) for 24 to 34 hours before
killing.
Fasting empties the digestive tract of feed and ingested matter, thus
reducing possible contamination of the carcass. To fast birds, pen them in a wire bottom cage during the fasting period.
A wire-bottom cage prevents birds from picking up feathers and litter. Provide fresh water to drink during the fasting
period. Water-starved birds will be dehydrated and the skin will appear dark,
dry, and scaly when the feathers are removed.
Holding pens should be of a kind that prevents the soiling of the birds' feathers.
Dirty birds contaminate the scalding water and on occasion scald, water is drawn
into the lungs and air sacs, so keep scalding water clean by changing it often.
Read More from prestigequeen.com :
Killing, bleeding, scalding, picking, pinning, and singeing
What your need for chicken plucker?
| Image | Product | Top rated |
killing cones for poultry 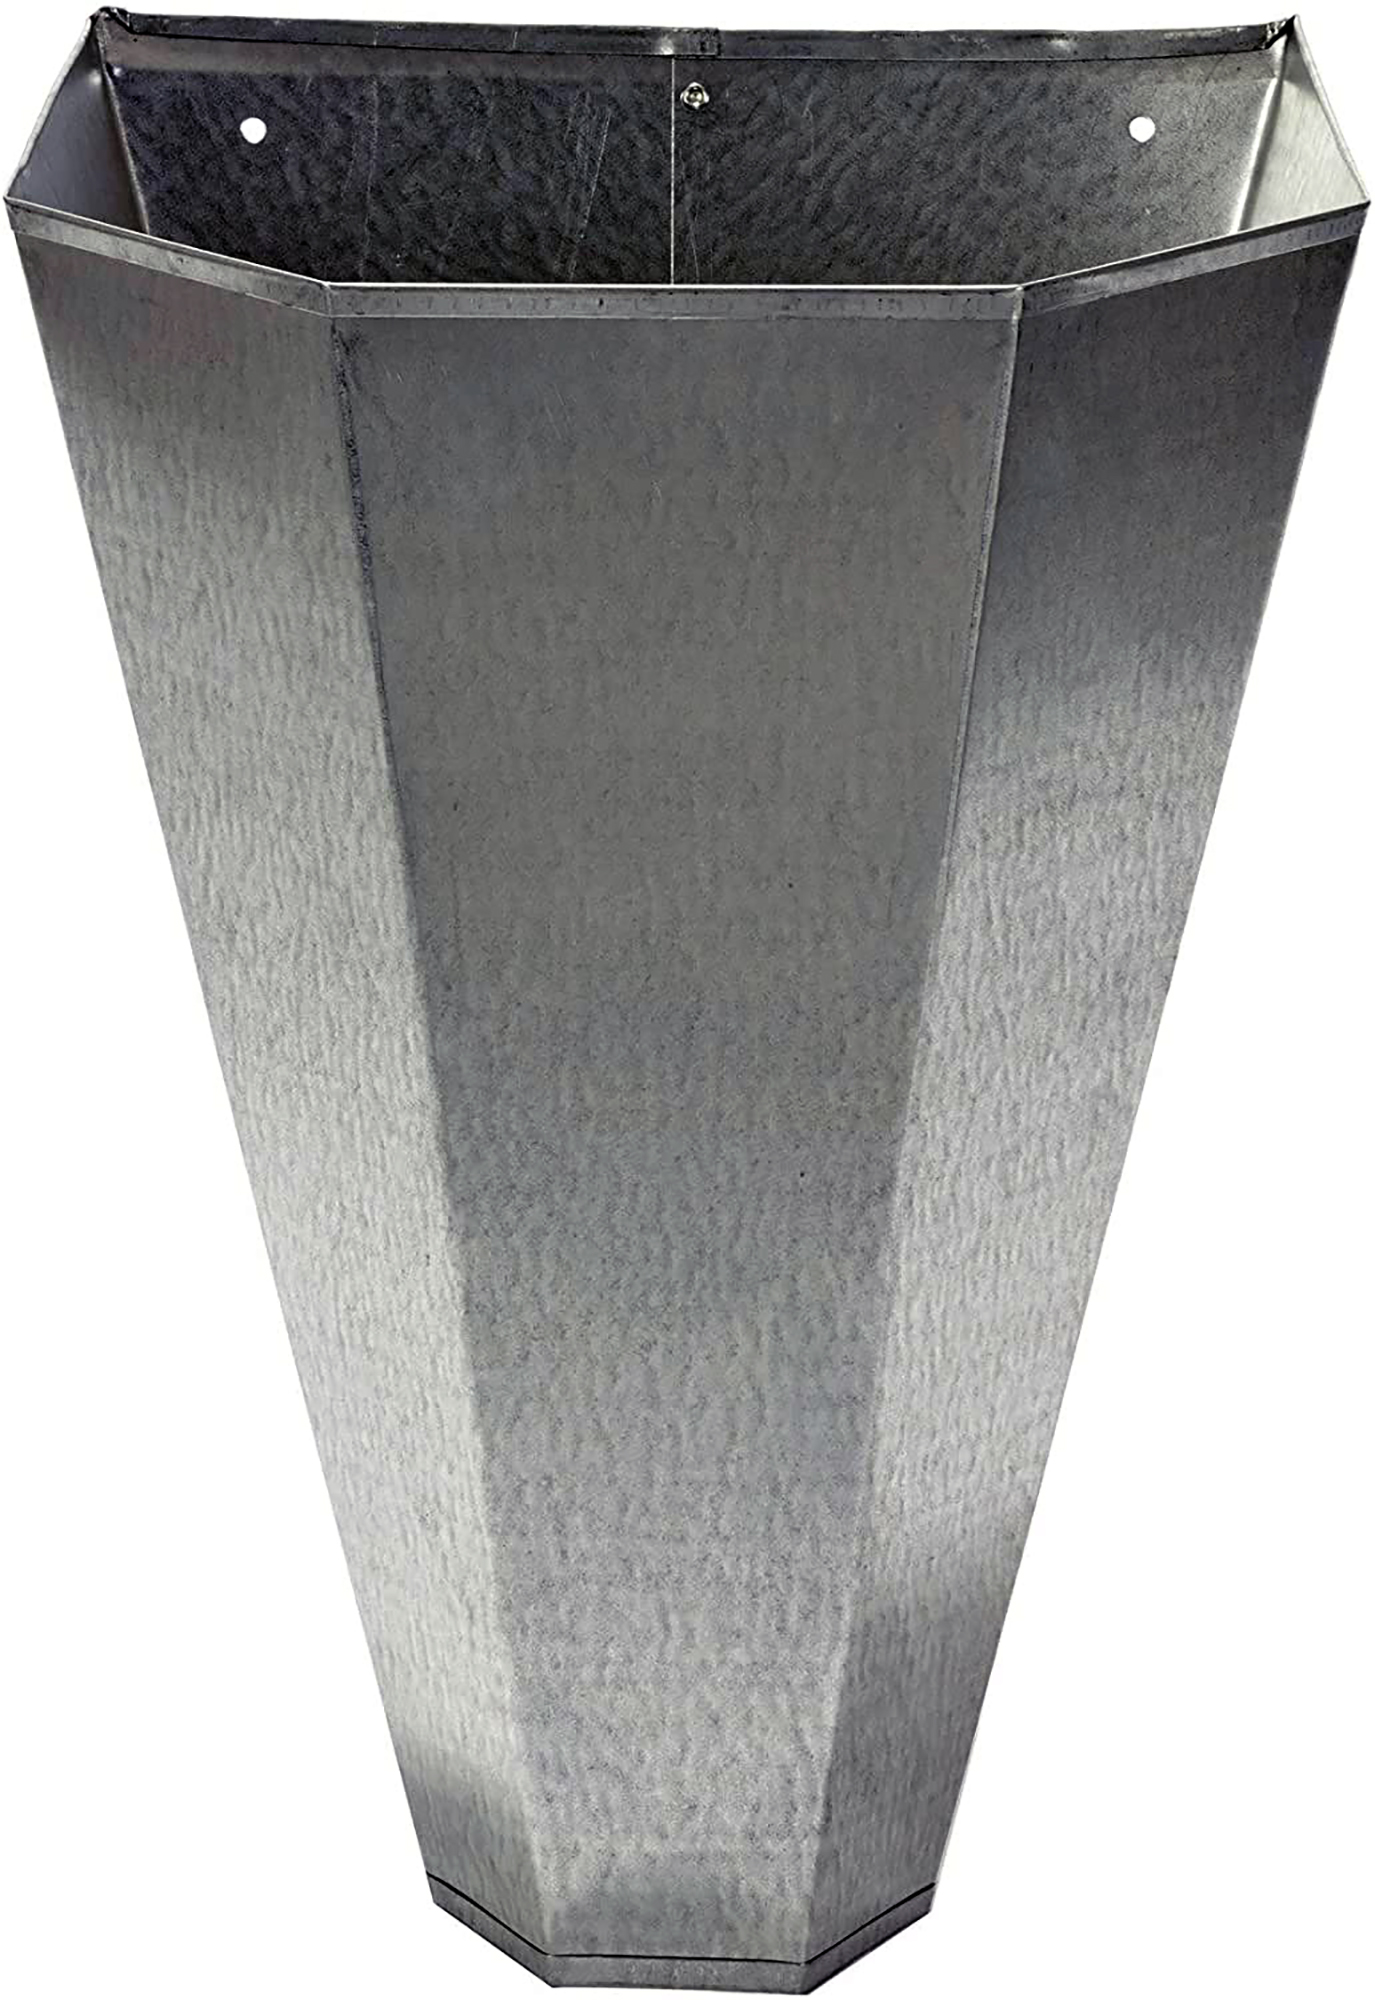 | Poultry Steel Restraining Cone
| Check Price |
Yardbird Replacement Rubber 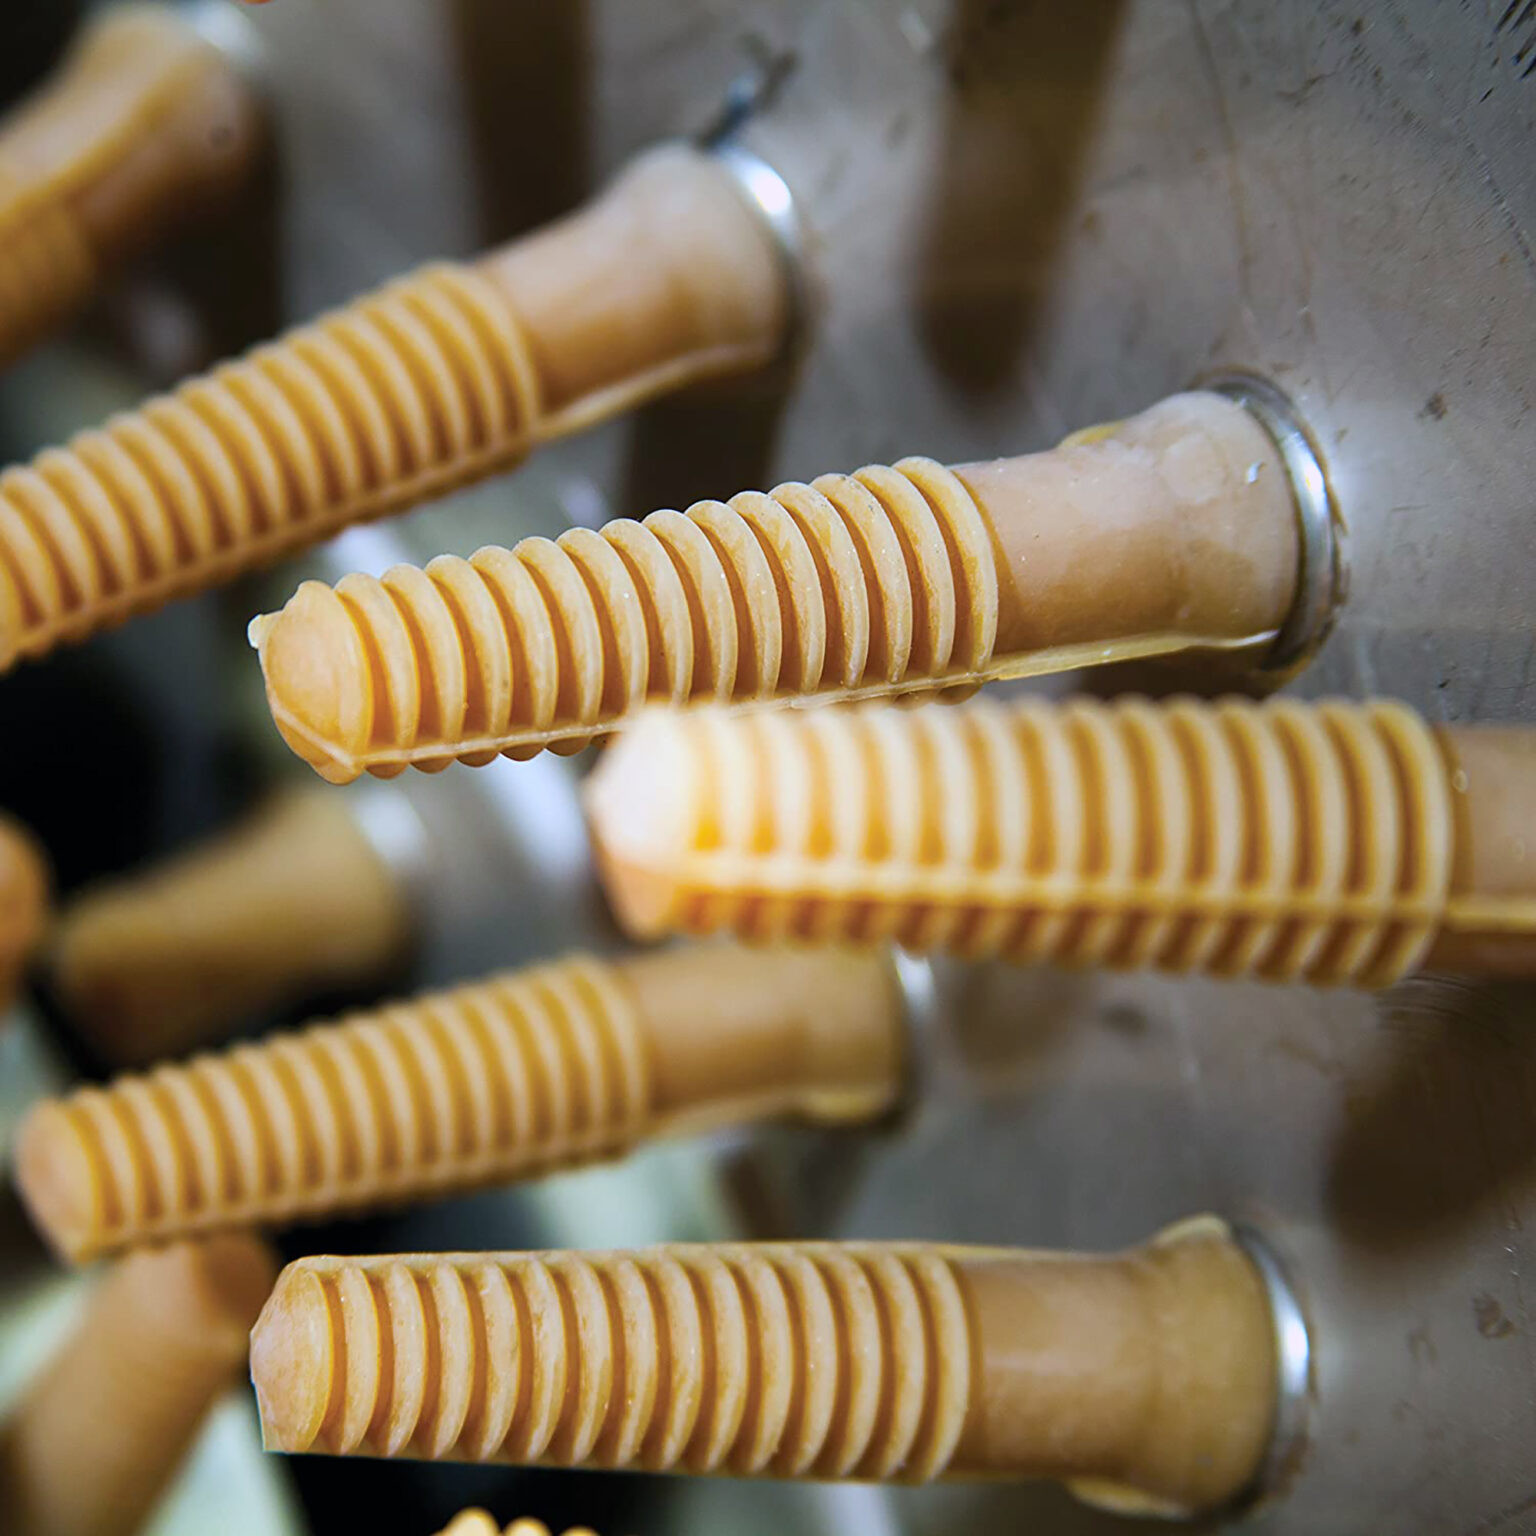 | Chicken Plucker Fingers
| Check Price |
13" x 18" Chickens or Rabbits-w/zip ties included/2.5 Mil/Freezer Safe (25) 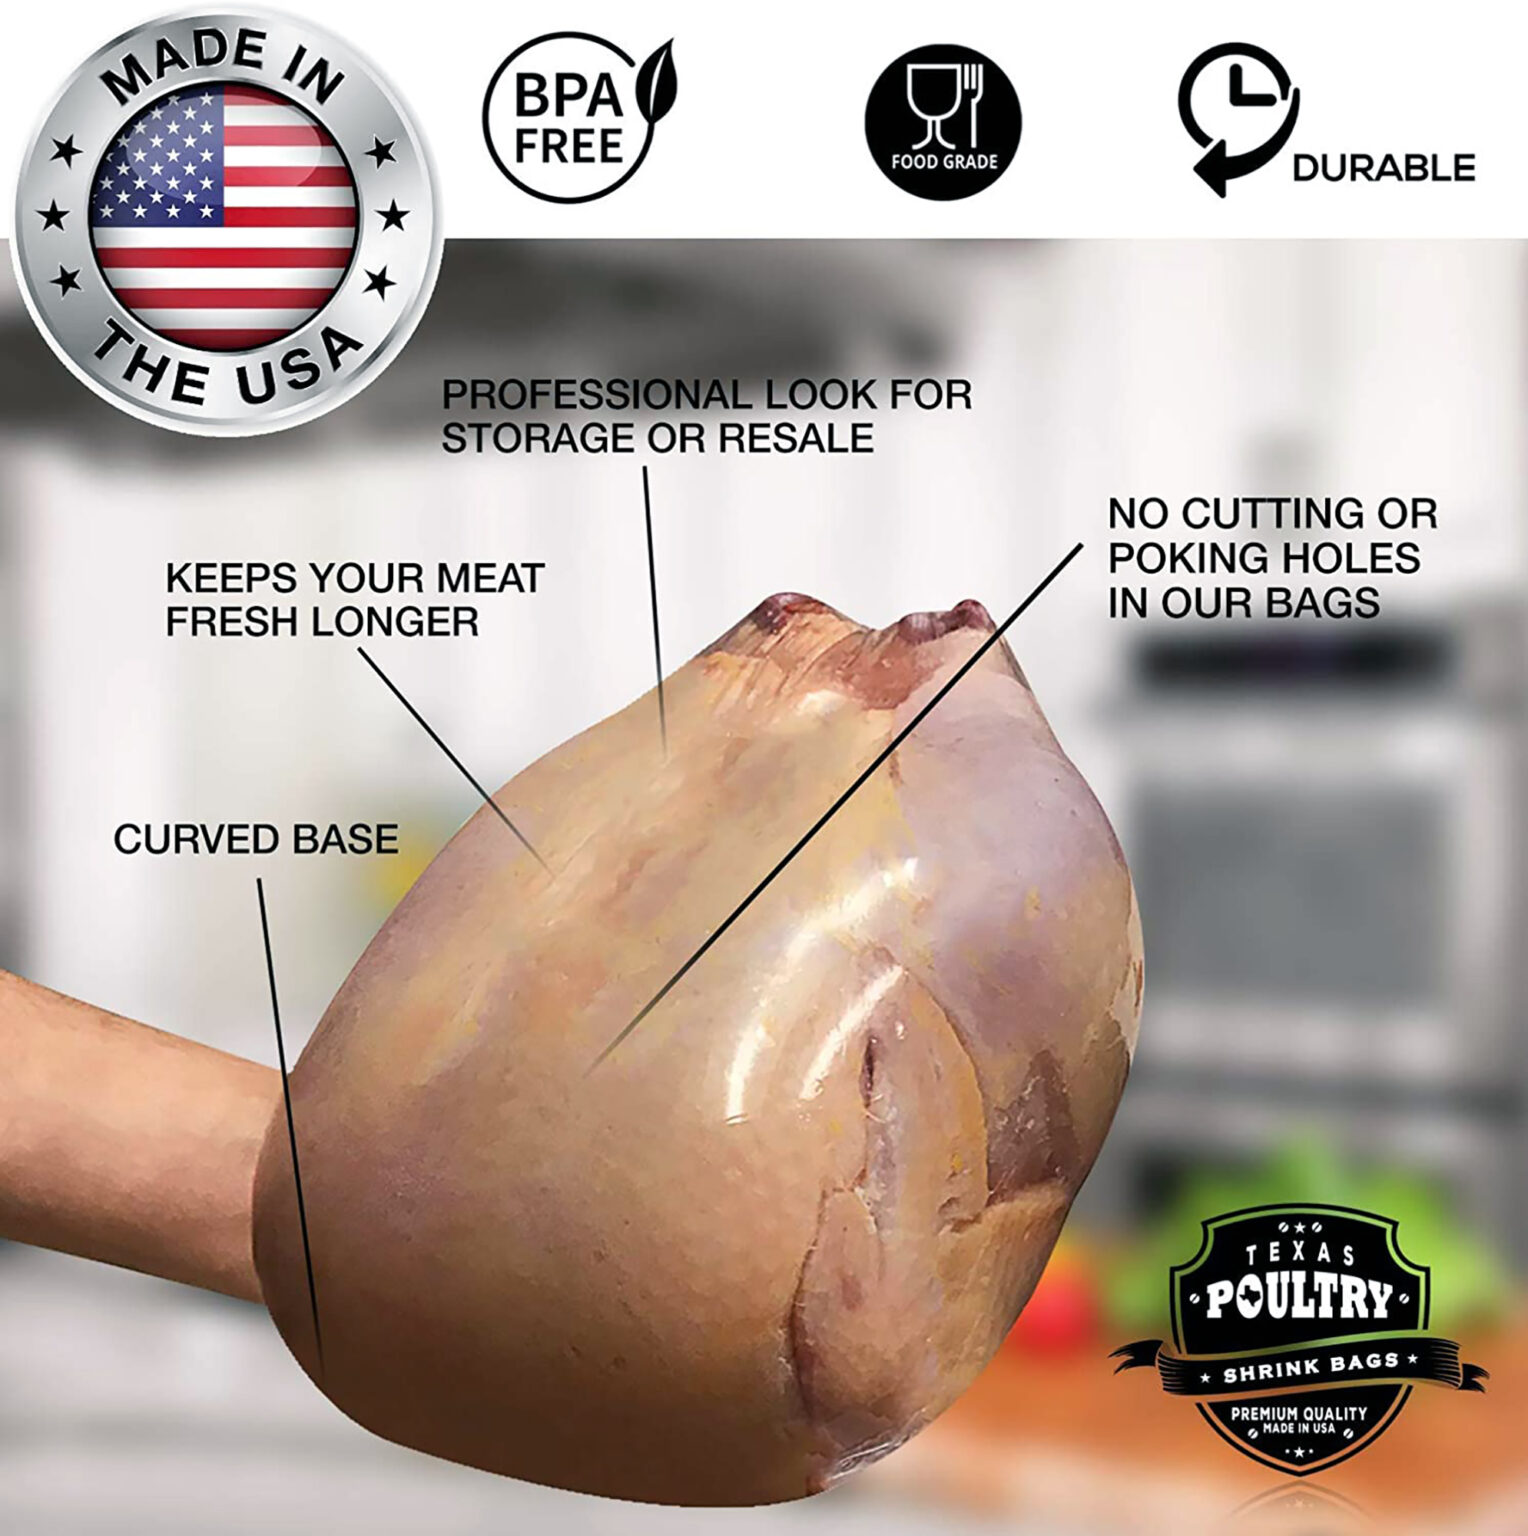 | Poultry Shrink Bags-Clear
| Check Price |
Chickens are one of the easiest meats to raise and butcher yourself. The process can be made easier and more efficient by the use of certain tools, but not always necessary to get the job done.
So, I am going to show you how to fully dress a chicken from start to finish so you too can enjoy the home-cooked chickens that you raised yourself.
Catching Chickens
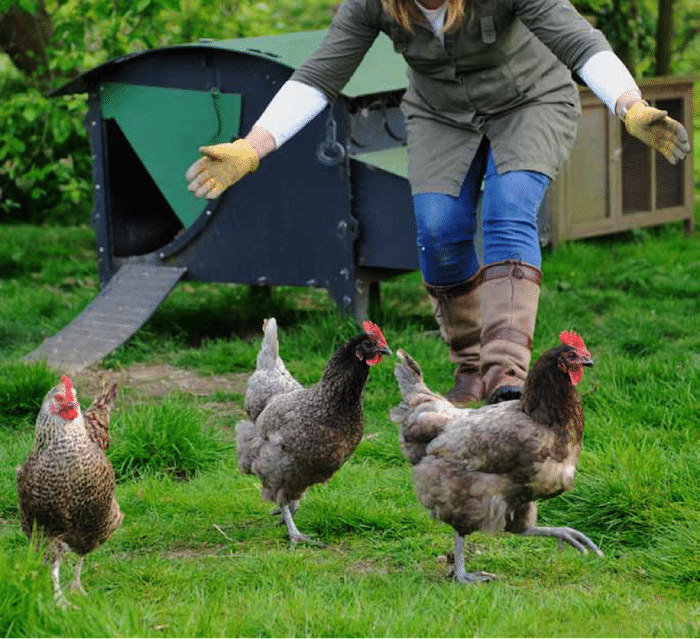
While it might be a no-brainer, the first step in this whole process is to catch the chicken! If you’ve ever tried catching a chicken, you know that they can be slippery creatures who like to taunt you more than a little bit. So, to avoid tiring yourself out, upsetting the rest of the flock, and generally looking silly, grabbing the chicken while it’s roosting is the best way. However, if they sense your excitement for nuggets and make a run for it, try cornering them in a small area, and attempt to cut off any escape routes they might have – then pounce. If nothing else, it’s good cardio!
Killing Chickens
Once you have caught your tasty feathered chicken nuggets, you obviously will want to kill it. There are several methods of doing this, from the old-fashioned chopping block or breaking its neck, to the more modern killing cones. Deciding how to kill your chicken is completely up to you, but I prefer whatever method is fastest as it’s not my intent to torture the animal but to humanely slaughter it so I can eat it.
Old-Fashioned
When I was a kid was the first time I was introduced to a chicken being slaughtered, and my dad decided to chop off our roosters head without breaking his neck first¦ that was when I learned that chickens can in fact run around for a while after being beheaded¦ (won’t lie, it was a bit traumatizing for me and I didn’t look at chicken nuggets the same way for a while – but I grew up and got over it because chicken is yummy and really good for you.)
Personally, this is my least favorite method of slaughter as I don’t feel like chasing my dinner around twice – and if you think chasing a chicken around is bad enough with its head attached, it is worse when they have even less of a brain. This method is as simple as it sounds (BUT VERY MESSY) while holding the bird upside down by its feet, which will lull the chicken into somewhat of a trance, lay the head/neck down on the chopping surface, and quickly (before the bird moves), BOOM, take the ax to its neck – this method is very quick and painless.
The second old-fashioned way of doing it is to break the bird’s neck and slitting the throat (slightly less messy). This involves taking the bird by the neck and slinging it overhead and using its body weight to break the neck. Imagine you are a cowboy trying to rope cattle, that’s a similar motion to this form of killing. If you are not as experienced at killing chickens, this may take more than one try to do it properly. Once you’ve succeeded at breaking the neck, take a bucket or container, and hold the bird upside down by feet over the container, and slit the throat to drain the blood out.
Modern Ways – How to Use a Chicken Killing Cone
More recently, people have turned to a quicker and less messy way of slaughtering their chickens – by using a killing cone. Whether homemade or store-bought, a chicken killing cone is very easy to use.
By placing the bird, head down, into the cone puts it in the perfect position to dislocate and break the neck. Some cones, like the one pictured, come with metal rods used to hold the head and twist, which breaks the neck. By using the cone, you eliminate the possibility of the chicken going for a quick jog after death. Before removing the chicken from the cone, ensure the bird is dead. You can do this by checking for breathing, or blink response if the eye is touched. If you aren’t sure the bird is dead, repeat breaking the neck again.
Butchering
The Best Knife to Butcher Chickens
When cutting off the head or slitting the throat, you will want to make sure to use a quality knife so you aren’t having to struggle during the process. This curved boning knife is my go-to, but most good hunting or multi-purpose cooking knives will do. Just make sure your knife is sharpened properly, free of chips or dents, and the handle is slip-resistant to avoid any injuries.
Now would be a good time to mention, that some people opt for skinning their chickens instead of going through the process of scalding and plucking their chickens. You can find a video on that here. If you decide to go that route, a proper skinning knife will be beneficial to you.
Bleeding
To avoid excessive splattering of blood, if a killing cone is not
available, hold the bird by the head until bleeding and flopping stops, which is
about three minutes. The blood can be caught in a container partially filled with
water for later disposal or directed into a sink with a stream of cold water to
hemolyze the blood and prevent clotting.
Scalding
How to Use a Chicken Scalder
To properly scald your chicken to ensure a good pluck, you will want to make sure you have some rubber gloves to avoid burning yourself or hurting your hands during the plucking process. You will also want to do this outside because it can be messy. There are two ways to scald your chicken, traditionally by boiling your water in a large pot/pan or by using a scalder specifically designed for this process.
If you decide to go the more traditional route, make sure you have a pot/pan big enough to put the whole chicken in. To start, fill the pot/pan with water, but leave enough room for displacement because the water level will rise once you dunk the chicken in it. Bring the water to a boil, and then bring the pan or pot outside – you can also boil the water over a small propane stove outside so you don’t have to move the pot. While wearing the rubber gloves, take the bird by the feet and immerse it in the water.
You are going to want to make sure that you don’t overscald or underscald your bird – between 5 and 30 seconds should be all you need. Try 15 seconds to start, and then take the bird out and try to pull a few feathers, if they don’t come out easily, put the bird back in the water for a few more seconds. Make sure to swish the bird around a little to let the water get down to the base of the feathers. Make sure to dunk the bird in the water far enough so all the feathers get good and wet. Once you’ve scalded it, it is ready to be plucked.
If you are using a chicken scalder (like this one), the process is similar, except the scalder will come with product-specific instructions. Please read these carefully before proceeding to avoid injury.
Once you have scalded your bird, some people dunk the bird into ice water directly after to help the skin avoid tearing while plucking the feathers, but this is not a necessity.
The scald temperature for broilers, roasters, and capons is from 125° to
140° F. Boiling water should be kept on a stove nearby to keep the temperature of
the scalding water hot enough. The hotter the water the shorter the scald time and
the more chance of overscaled.
Scald time is normally 60 to 90 seconds in water 125° to 140° F. Two dips of 20
to 30 seconds each may be adequate for the hotter water. Grasp the chicken by its
feet. Immerse head-first in the scalding water to the middle of scales on the shank. Move
bird up and down and from side to side while in the water to ensure even and
thorough scalding. Test the release of tail and wing feathers immediately
afterward. Repeat short dips of scalding until large tail and wing feathers are
easily pulled.
Picking
The bird can either be held, suspended, or placed on a table for picking.
Use a slight pressure with a gentle rubbing action for fast, easy, and thorough
removal of feathers and pinfeathers. This should be done as rapidly as possible. A
suggested picking sequence is wings, tail, legs, breast, neck, and back, in that
order. Establish the sequence that works best for you. Five minutes is adequate
for an experienced feather picker if the bird has been scalded properly
By Hand
Plucking by hand is common if you are only plucking a few birds at a time, but if you are planning to pluck several at a time or plan to do so on a consistent basis, a chicken plucking machine will make the job a lot easier and quicker.
To pluck by hand you will want to hold or hang up the bird upside down and start by de-feathering the wings first, this gets them out of the way to clear the rest of the body. Take a few feathers in your gloved hand and yank quickly down, the feathers should come out easily, then repeat until the bird is naked. You don’t want to grab too many feathers at once or you risk tearing the skin. The first few times you do this, it will take longer, but on average a chicken can be plucked in 5-15 minutes. It is possible you may need to rescald your chicken a few times during the process if the feathers seem to be more difficult to pluck.
How to Use a Chicken Plucker Drill Attachement
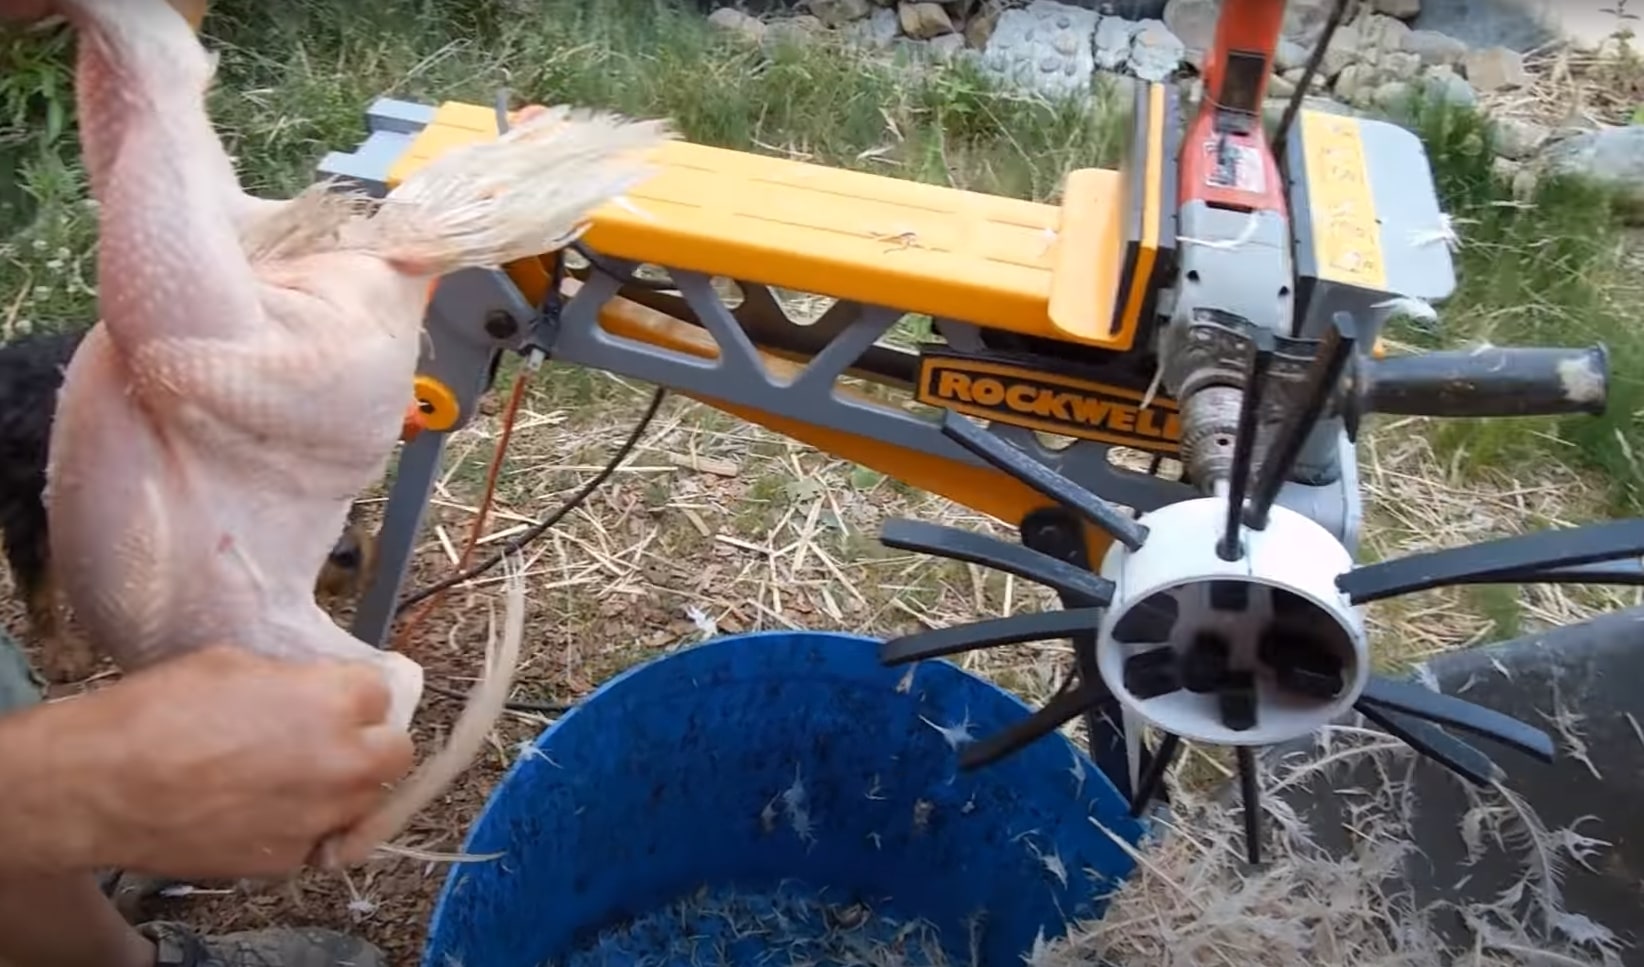
If you don’t feel like doing all the work by hand, the more modern way of plucking your chicken is by using a drill attachment! It may sound silly, but I assure you, it’s awesome. This chicken plucker drill attachment is a quick and easy way to remove the feathers from your bird. By attaching this to your drill, you can take those feathers right off – the rubber fingers will go against the “grain” of the feathers and yank them right out far faster than your fingers can. Be careful about flying feathers though, and you’ll want to keep a broom around if you decide to do this on a porch or in a barn. By using the drill attachment, the feathers will need to be cleaned up, versus plucking by hand where you can deposit the feathers exactly where you want them.
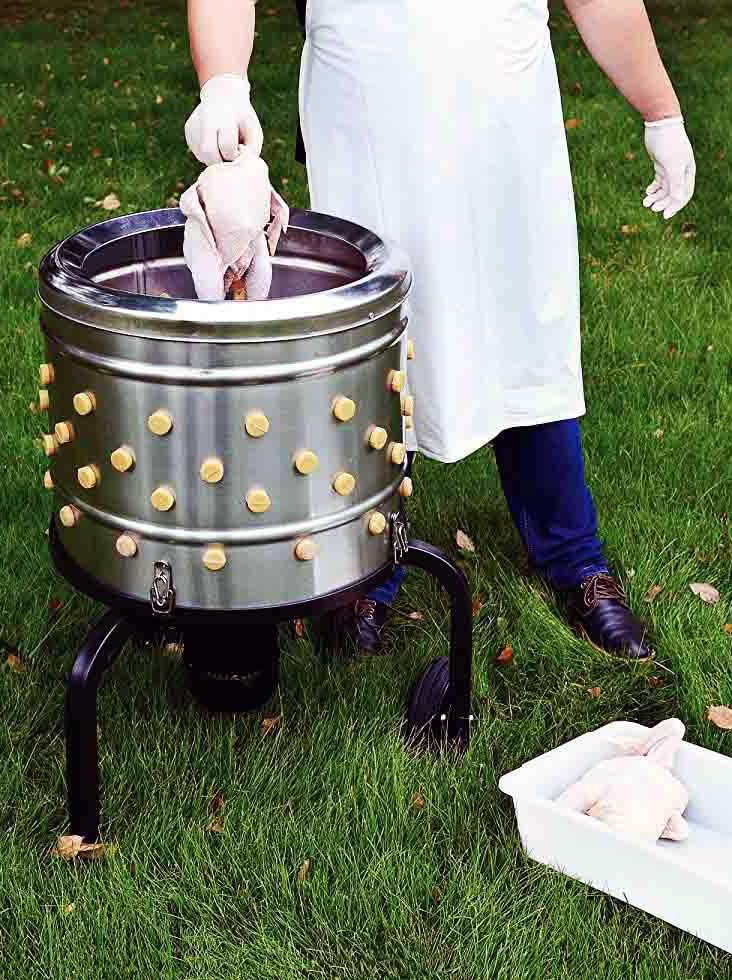
How to Use a Chicken Plucker Machine
This chicken plucker is by far the most efficient of our options since you can put the bird directly in the machine, turn it on, and it will defeather your chicken in just a few seconds! If you plan to do this on a regular basis, this is definitely worth the money for the time it will save you. Not only does it have hundreds of little rubber fingers to remove feathers, but it also has a basin that holds all those feathers so you can clean them out easier later on.
Pinning
Pinning is easier and faster if it can be done under a gentle stream of
cold water. Again use slight pressure and rubbing motion. A pinning knife or
any other dull instrument will be helpful in getting the few hard-to-get
pinfeathers. Use pressure starting below the follicle to squeeze out the
pinfeathers. A few may have to be pulled.
Singeing
Semi-mature and mature chickens and turkeys have a few hairs that
are seen when feathers are removed. Singe these hairs by slowly rotating the
de-feathered bird in an open flame. Singe torches are available commercially, but
a bottle gas torch or open flame on a gas range works very well. Do not burn
yourself or start a fire.
Gutting
Once your bird is good and naked, you will want to gut the chicken to prepare it for cooking. You will need to get out your knife if you haven’t used it already, and to gut the chicken, hang it upside down and you’ll want to start at the “vent” – which is just a fancy term for the anus. Cut around the vent, but be careful not to cut too deeply or you will hit the intestines.
Fun Fact: Salmonella bacteria are usually located in the intestines of the bird so you can avoid unnecessary contamination by carefully avoiding a puncture of the intestines while gutting.
There is a scent gland (known as the “preen” gland) at the base of the tail that produces a foul-smelling oil – you'll want to cut that out in a circular motion so you don't end up eating it. The goal is to cut the vent free and disconnect the connecting membranes so you can pull all the guts out without ripping the innards open.
Next, use clippers or a butcher knife and cut away the head if you haven’t already when killing the chicken. Holding the neck, pull the skin tightly and take your knife, and cut a slit from the backbone to the end of the neck.
Then separate the neck from the windpipe and pull the crop and windpipe completely away from the bird. Be very careful not to puncture the crop (think of this as a “pre-stomach” or holding place for food before being digested), especially if the chicken has been eating recently. Cut this section off and then cut the neck off at the backbone. If you want to keep the neck for soup or broth or such, set it aside, if not, put it with the rest of the waste.
Click here for image of a chicken’s digestive system.
Now you will want to create an opening big enough to put your hand inside the body. Insert your hand in a flat position with the top of your fingers pressed upwards against the breastbone of the bird. Carefully scrape the intestines loose from the top and sides of the body cavity. When your fingers can't go any further, curve them down and scoop out the intestines. DO NOT wiggle your fingers or squeeze too much or you will break the intestines or innards open. Be sure to remove everything, including the heart, liver, and lungs.
Now is a good time to remove the feet of your chicken. Pull the leg straight and feel for the cartilage in the leg joint and cut here. If you are cutting into bone, you’re doing it in the wrong spot.
Finally
Now that your chicken is naked and gutless, be sure to rinse it off and out thoroughly. Now it is ready to store or be cut up and cooked in your favorite recipes!
So to recap:
- Catch the Chicken – Hands needed.
- Kill the Chicken – Hands, Ax, Knife, or machine needed.
- Scald the Chicken – Pot/pan, boiling water, rubber gloves, and possibly ice water needed
- Pluck the Chicken – Hands, Drill attachment, or chicken plucker machine needed.
- Dress the Chicken – Knife, gloves, possibly clippers, and strong stomach needed.
- Cook the Chicken – Whatever is needed for your recipe is needed.
- Eat the Chicken – Appetite and clean hands needed.
The evisceration of the bird
Remove feet at hock joint
Use a boning knife or shears. The bird can be in a
shackle or on a table. Hold feet with one hand so as to put backward and upward
pressure on the hock joint. With a sharp knife, cut through the hock starting on the inside
joint surface. Hold shank and pull the joint into the knife to aid in cutting through the
joint. A slight movement of the bird's feet may help to complete the cut.
Remove oil gland
Bird still suspended or on the table. Start the cut one inch
forward of the oil gland nipple, cut deep to the tail vertebra, then follow the
vertebra to end of the tail in a scooping motion.
Remove head
Cut off the head between the head and the first neck vertebra with
a knife or shears.
Split neck skin
Insert knife through the skin at the point of shoulders, then cut
forward guiding the knife up the back of the neck.
Pull crop and trachea (windpipe)
Pull skin loose from the neck. Pull outcrop and
trachea. This can be done after removing the lungs.
Remove neck
The neck can be cut off at this point or after chilling. Cut neck muscle
with knife or shears, then remove neck by twisting. Remove neck flush with body
junction. Wash and chill neck.
Abdominal openings
There are two kinds of cuts used for the abdominal opening: The midline cut,
which is a vertical cut from the keel down to the vent; and the bar cut, which
leaves a horizontal strip of skin across the abdomen. This can be used to restrain
the legs when the dressing is completed.
Midline cut
Gently pull abdominal skin and wall forward and up away from
entrails (viscera), then make a cut through the skin and wall starting with the
knifepoint just to the right of the point of the keel (over gizzard) and extend cut
to the tail alongside the vent. Make cut slowly and do not cut intestine. This can
be done by not cutting deeply into the abdominal cavity or by holding the wall
up and away from the intestines. Don't make deep, fast cuts. Complete the cut
around the vent. The vent cut can be done easily and safely by keeping the knife
next to the back and tail, as far as possible from the vent. This cut is routinely
used on broilers and small roasters. Trussing materials are needed if capons or
turkeys are opened in this manner.
Bar cut
This cut is especially useful for large birds such as turkeys and capons.
This procedure does not work well on extremely short-legged birds or birds with
large deposits of abdominal fat. The bar cut provides a natural and simple
method of trussing the carcass after processing. The procedure is done in three
steps:
Step 1: Preferably with the bird suspended by the hocks make a half-circle cut
around the vent. Insert a short, thin-bladed knife into the abdominal cavity above
the vent next to the inner surface of the tail vertebrae. Cut laterally in each direction to pin
bones or slightly farther.
Step 2: Insert index finger into the opening cut, up over intestine. Using finger as a
guide, extend cut with shears on around to free the vent. Gently pull cloaca and a
few inches of intestine out to prevent it from dropping into the cavity.
Step 3: Complete bar cut by making a horizontal cut (side to side of bird) about
three inches long. This cut should be about one and one-half to two inches below
the point of the keel. Below this cut, there will be a bar of skin about one and
one-half to two inches wide. Thread the cloaca and intestine over the skin bar.
Draw viscera (pull entrails)
Stretch the abdominal opening, insert hand as far
forward as possible, breaking attachments of organs to the wall as you go. Pick
up heart between the index and second finger, cup hand, and gently pull all viscera
out, using a slight twisting motion as the viscera is brought out of the abdominal
cavity. Leave viscera hanging to the bird.
Harvest giblets
With knife or shears clip off liver”avoid cutting the gall
bladder. The gall bladder may be pinched off of the liver. Trim liver out, rinse. Pull off
the heart, trim off the heart sac and the auricles (top part), and rinse. Clip gizzard
attachments (stomach and intestine). Force thin point of shears through gizzard
and cut thin wall side. Open under a gentle stream of water. Peel gizzard lining,
rinse. Wash all giblets and chill. Break any remaining attachments of viscera and
put viscera in an offal container.
Remove gonads (ovaries or testes)
Pull by hand, or clip attachments with
shears first and then remove by hand, or remove with a lung scraper. The gonads
are attached to the backbone by ligaments (tissues) just above the liver. They will
be on the floor of the cavity when the bird is on its back. Only surgical capons
will be without gonads. Each bird should be checked anyway.
Remove lungs
Remove with lung scraper or by hand. By hand, use the index finger
to break attachments of lungs. Start next to ribs and roll finger toward the center.
Repeat for other lungs and pick out lungs. Make certain body cavity is clean
Wash
With hose or under the faucet. Thoroughly wash inside of the carcass. Repeat
washing procedures for outside and rub off all adhering dirt, pinfeathers, loose
cuticle, blood, and singed hairs.
Chilling and packing
Prechill
Put the bird carcass in a chill container filled with tap water. Either let the
water overflow continuously at a slow rate or periodically change the water. This
will cool the carcass to water temperature and further clean the carcass. Use only
water that is safe for drinking.
Chill
Ice and water are necessary to chill processed poultry effectively. The
carcass temperature should be brought down to 40° F. before packing in bags.
Large capons will require three hours or longer to chill properly. Turkeys that are
to be frozen should be held in 40° F. chill water for 18 to 24 hours before packing
and freezing. Remove chilled carcasses from ice and water, hang by the wing, and
let drain 10 to 30 minutes before bagging and placing in storage.
Refrigeration
Refrigerate at 29 to 34° F. or freeze. Fresh-dressed ready-to-cook
poultry should not be kept over five days in a refrigerator. If poultry is to be
frozen, this should be done by the third day after it is dressed and chilled.
Freezing
Freshly dressed poultry should not be frozen until after it is chilled to
40° F. or below. Do not put warm freshly dressed poultry in the freezer.
Did you enjoy this tutorial? If so, don’t forget to bookmark it to refer back to, and share it with your friends!
I’m sure there are many other people out there just like me, who like to eat healthy meat without breaking the bank. So why not keep it local – and there’s nothing more local than your own backyard! There’s not much as satisfying as a good home-cooked meal that’s good for you, so why not raise your own chickens?
If you have any tips or tricks to make this process easier, share them in the comments below, I’d love to hear them!
Read More from prestigequeen.com :
Contents