
DIY chicken waterer
by Jennifer Behm Chicken farmer| Last Updated 25 March 2023
Are you fade up with the daily chore of cleaning poultry water? If so, then this article will help solve your problems by designing easy DIY of an automatic chicken watering system that will help your chicken get fresh water all year round.
Raising chicken requires a lot of responsibility but is also very profitable in many ways like; getting fresh meat, production of fresh eggs, and getting manure from there which can be used on the farm. Newly hatched chicks are fragile and must be handled with care unlike helpless babies, chicks are.
We will discuss various DIY topics which will include; baby chick waterer, homemade heated chicken waterer, DIY. PVC chicken waterer, DIY chicken nipple waterer, and automatic chicken waterer with the float. With these DIYs, you will be able to do your activities outside the home without getting worried about how the birds are going to get fresh drinking water.
Read on:
- Homemade heated chicken waterer
- DIY PVC chicken waterer
- DIY Chicken Nipple Waterer
- Automatic waterer with float
- DIY Baby Chick Waterer
Read more from prestigequeen:
Homemade heated chicken waterer
After years of many chicken waterers failing during winter, farmers had to improvise a way of providing their chicken fresh water all year round. They came up with two major methods.
Requirements:
Start by cutting the bottom of the bucket, this is easily done by starting a hole with a drill then cutting with a jigsaw. Proceed by removing the handle, beginning from the lower edge of the bottomless bucket. Make a small cut about 3 inches up on the side using a coping saw, then afterward set that bucket aside.
Proceed by wrapping heat tape around the outside of the new bucket near the lower part using duct tape which holds the tape in place. Continue by pushing the bottomless bucket to the bucket waterer. Make sure the heat tape feeds on the outside of the slit. The position of the bottomless bucket should be extended some inches beyond the lower part of the complete bucket waterer.
An optional additional step can be to wrap an insulator along the edges and upper part of the bucket.
Another alternative heated chicken waterer.
Requirements:
- 10 tin can with one having an open end
- Extended cord
- Light bulb fixture
- 35W light bulb
- Scrap wood
Start by creating a base that will be used to hold all the pieces together. Place the tin on the scrap wood and draw along the lid on the scrap wood. Then use a jigsaw to extract the circular piece of wood.
Cut 1/8'' inside the circular line on the wood because the can must fit over the wood. Finish by drilling a 1 hole in the center of the base.
Proceed by cutting off the female edge of the extension cord then pull off the insulator at the end.
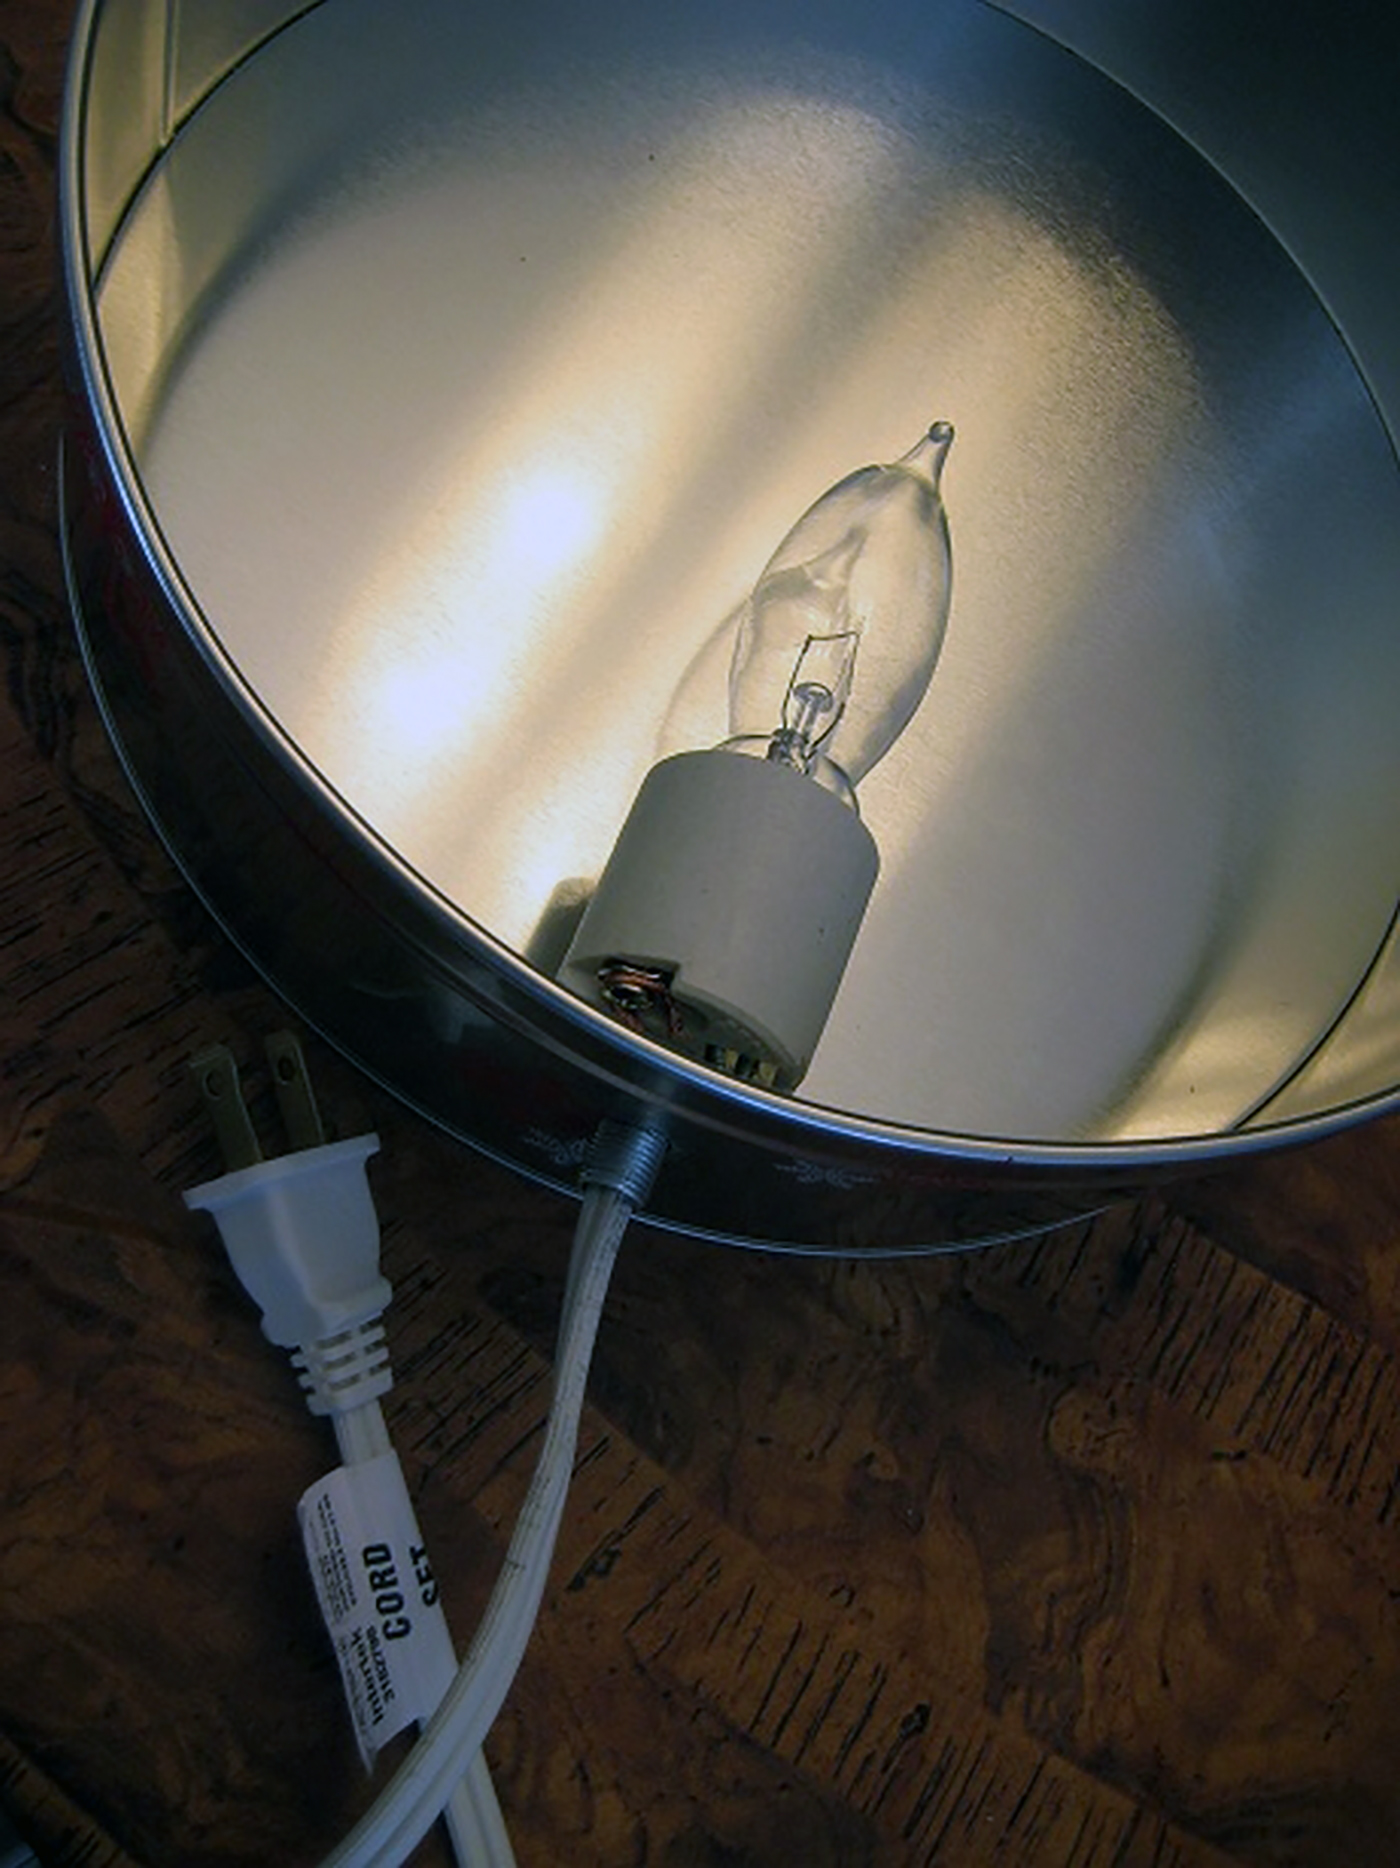
Then connect the wire ends to the fixture then test the wiring by plugging into a socket. Finish by extending the cord through the drilled hole in the wood and screw the setup to a base. Place the can over the base with the closed side being on the upper part. This will act as a heater to the water. Finish by placing the chicken waterer on top of the setup and the activity is complete.
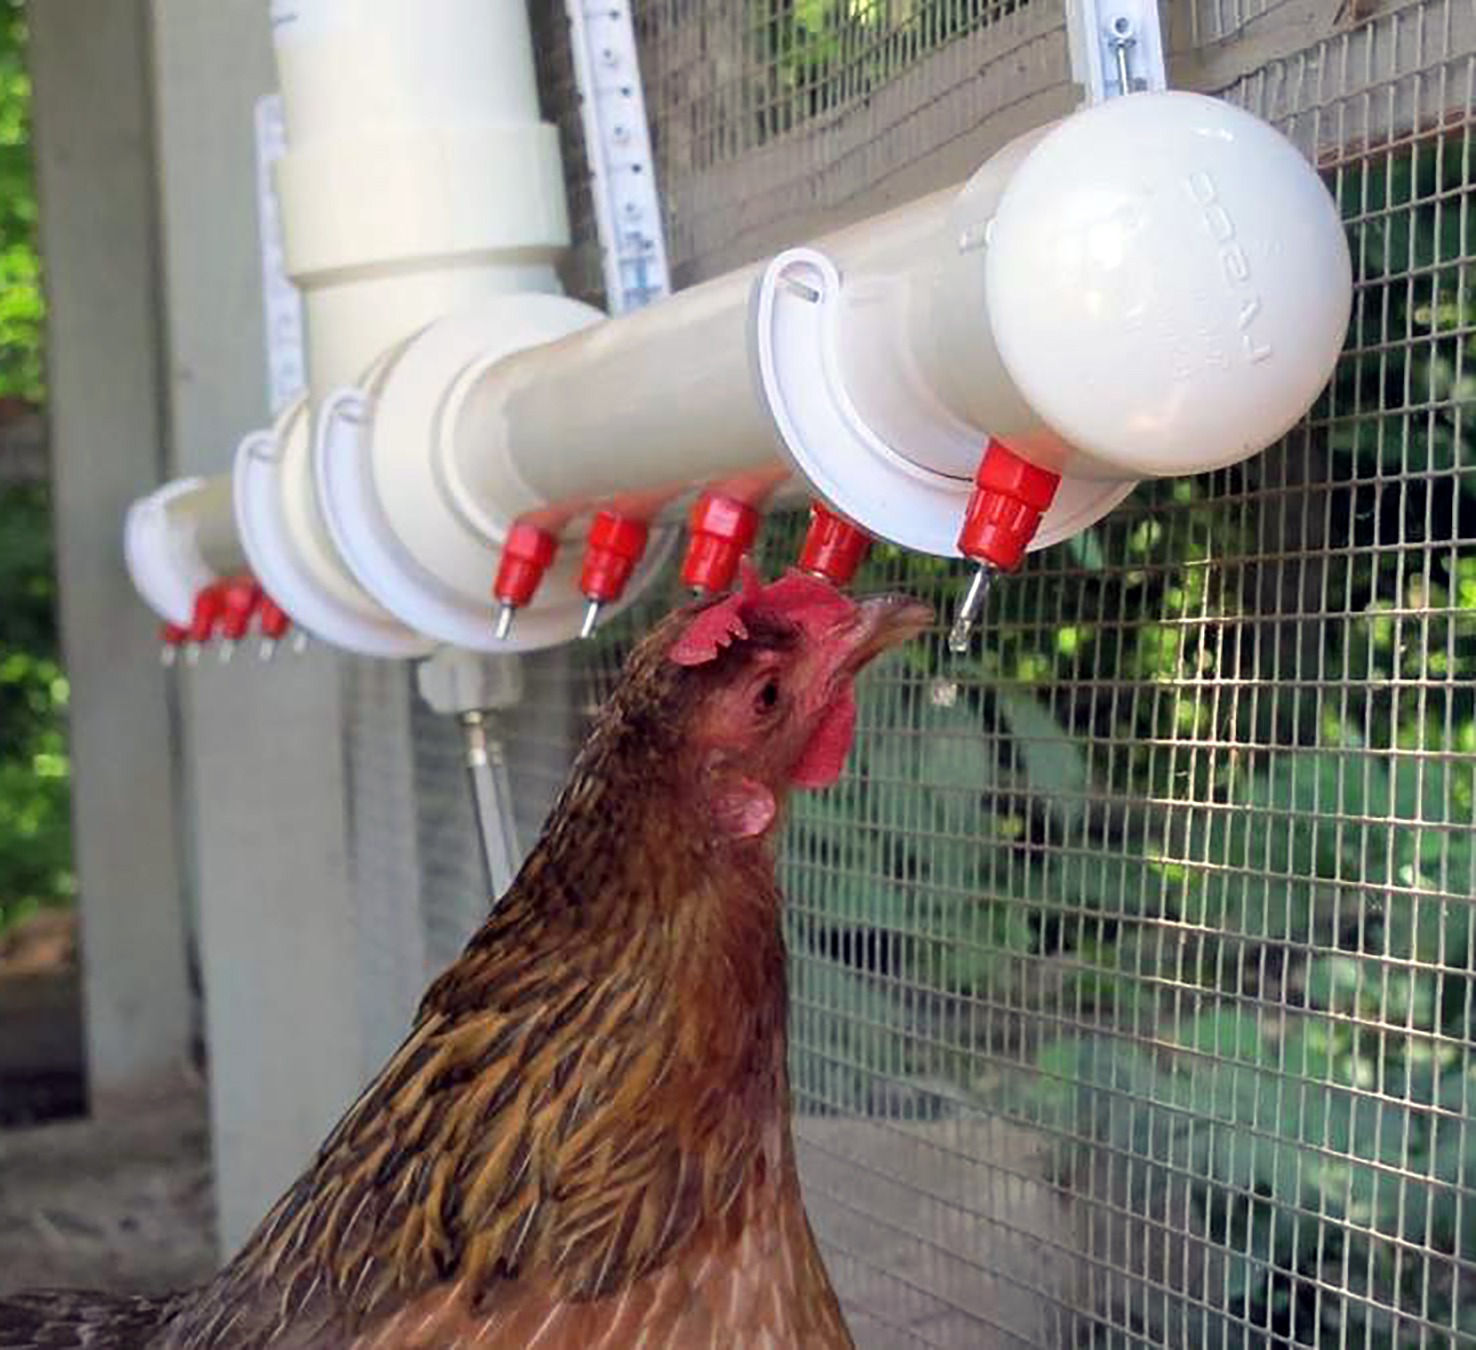
DIY PVC chicken waterer
Requirements:
- 4 Beaktime watering cups
- 2-foot piece of ½ inch PVC pipe
- 2-foot piece of 2-inch PVC pipe
- 3-inch piece of 3-inch PVC pipe
- 4 inches by 3-inch coupling
- 3 inches by 2 inches coupling
- Four ½ inches adapters
- Two ½ inches threaded caps
- 2 two-inch cleanouts drain plug adapter
- Two-inch cleanout drain plug
- Two-inch trap adapter fitting
- Two 90-degree cross tee
- 2 two inches by ½ inch bushing
- Pipe joint compound
- PVC cement
- 5 gallons of water
- 3' 2 two by six wood
Start by cutting half-inch pipe into 2 pieces of 6 by 4 inches long,3-inch pipe cut three-inch section.
Proceed by cutting two pieces of wood needed as a bracket of 12-inch length, add a block of wood with a 45-degree angle on the edges to create support.
Insert the tee that will be positioned at the base. Apply PVC cement to join the 2 inches by ½ inch bushing on the left and right side of the tee. Proceed by cementing on the cleanout adapters to the lower opening. Screw the cleanout plug into the cleanout adapter using joint compound then connect the two-inch pipe to the upper opening by applying cement. At the top side of the two-inch pipe, glue the two-inch trap adapter fitting on then leaves it to cure.
When constructing the horizontal beam, you first start with a 3-inch piece of ½ inch pipe and piece them together by gluing the cup couplers. The most appropriate cup coupler is the half-inch PVC coupler. Continue, by adding a six-inch piece to the end of the cup coupler. This will be followed by another cup coupler followed by another three-inch piece of pipe.
Place the cups to line up straight. Redo this step again for the other sides of the beam. Install the half-inch adapter using a joint compound to screw on the plug. Continue by adding two half-inch adapter in both directions of the tee using a joint compound.to prevent the water from spilling, the right and the left side horizontal beam should be cemented and the cups should be positioned flat.
The next procedure will be on top half construction. Use the 3-inch piece of three-inch PVC to connect the 4 inches by 3inch coupler and the 3inch by 2-inch coupler and secure them with cement. Place the jug close to the wooden bracket to reduce the chances of falling off. Apply a cleanout adapter to the two-inch opening of the couplers using glue and give some time for curing per the duration stated in the description of the cement you are using.
The next step is making the bracket for mounting. First, you have to figure out where the neck of the bottle will be positioned on the platform of the bracket. Start by drilling the three-inch hole for the cleanout adapter sited on the top piece that lays easily inside the opening. Create some room to screw the cleanout adapter onto the trap adapter which sits at the top of the bottom shaft. Use a hole saw when cutting it open. Continue by joining the top piece to the vertical piece by screwing to attach the stud where you plan to install the waterer. Add the support piece by using screws to the bracket. For easy attachment later when the height is determined, start the screws in the vertical board.
The next step involves changing the bracket. For an appropriate approximation of the height, lower the top section into the hole of the bracket then screw the lower portion to the top portion. Mark using a pen where the top of the bracket needs to be. Proceed by disconnecting the two top and bottom portions of the waterer and leave them aside. Mount the bracket firmly to the site preferably the stud in the run area of the coop. Continue by entering the 2 by 4 board onto the 2 by 6 board which should fit perfectly. Install a 2 by 4 piece behind the water jug replacing the space between the 2 by 4 and the water jug. This facilitates space for the eye bolts and for later use of bungee cords to fasten the water jug to the stud.
Finish the setup by connecting the top and bottom portion snuggly using a joint compound. Double-check all the joints making sure they will not leak when water is connected. Open the top of the jug and insert them into the upper part of the setup. Monitor for any leakage and tighten where necessary.
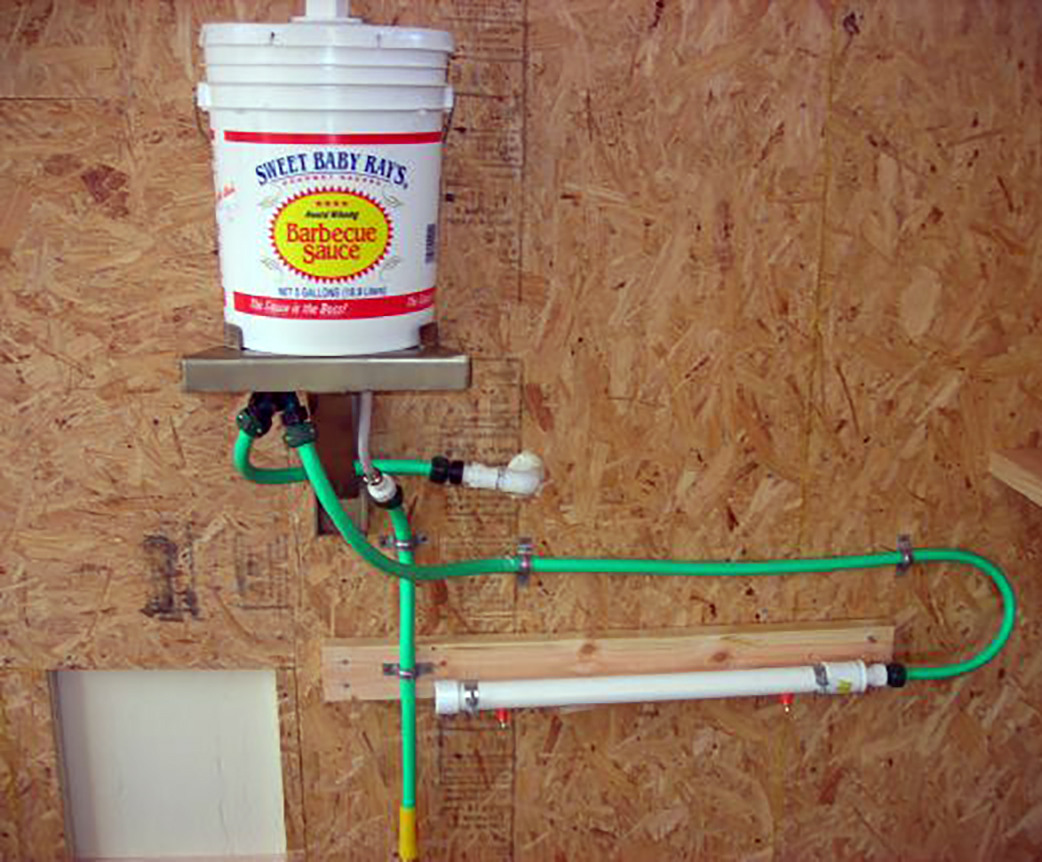
DIY Chicken Nipple Waterer
Requirements:
- Container
- PVC pipes
- Drill bit
- Thread seal
- Pressure regulator
- Install tool
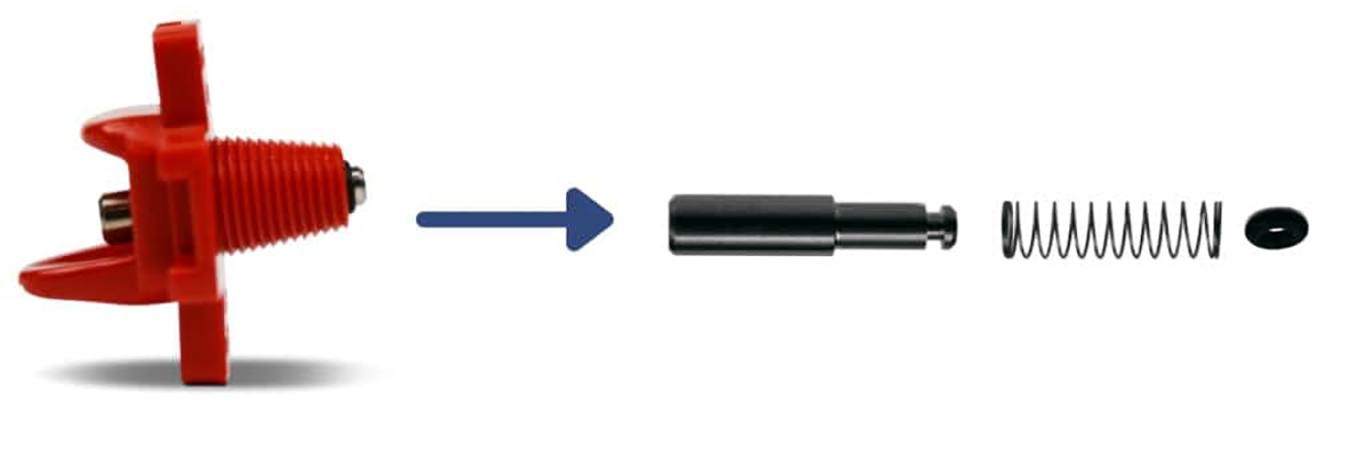
The Nipple
One nipple is required to provide sufficient clean water for six to eight chickens in places with a moderate climate, in hot places one nipple should be enough for three to four birds.
Nipples have many types; others are horizontal and others vertical. The decision of using the different types depends on the materials you have for installation. Horizontal poultry nipples are more flexible and can be installed in nearly everything from buckets, PVC pipes to soda containers.
Installing the nipple
The chicken nipple installation tool is handy because it fits into a drill simplifying the process of screwing nipples easily and fast. The most usable chicken nipple drill is the 11/32 inch because the hole made are tighter reducing the chances of water leakage later when testing. When drilling thick plastic containers, the hole has to be threaded this is to prevent the tap from being popped out when water is filled into the container. Thin plastics do not require threads.
Thread Seal
Thread seals are highly recommended to help prevent leakages, when using silicon make sure not to get it on metal pins and also take care of O-rings, allow it to dry well before proceeding to use. Pressure regulators play an important role in ensuring the smooth flow of water. Nipples are designed to be used under low pressure below five PSI. Above this pressure, the chicken won't be able to press the pin because of the excess pressure being exerted by the water. If they can open the pin the water will come out too fast to be consumed.
Installing the thread seal
When screwing the nipple tighten it about eighty percent to prevent the container from breaking, also make sure the nipple is installed at a level so that the inside of the threaded container of the nipple has a slight tilt, to facilitate the nipple to self-drain when the chicken stops drinking. This is crucial especially when living in an environment that is freezing, water that is held internally can't freeze. Drill about two holes in the container that will act as a breather to prevent the container from creating a vacuum.
The chicken nipple should be spaced according to the size of your chicken for an average chicken the spacing should be about twelve inches. Making the nipples too close will hinder the birds from drinking the water at a time.
Installation
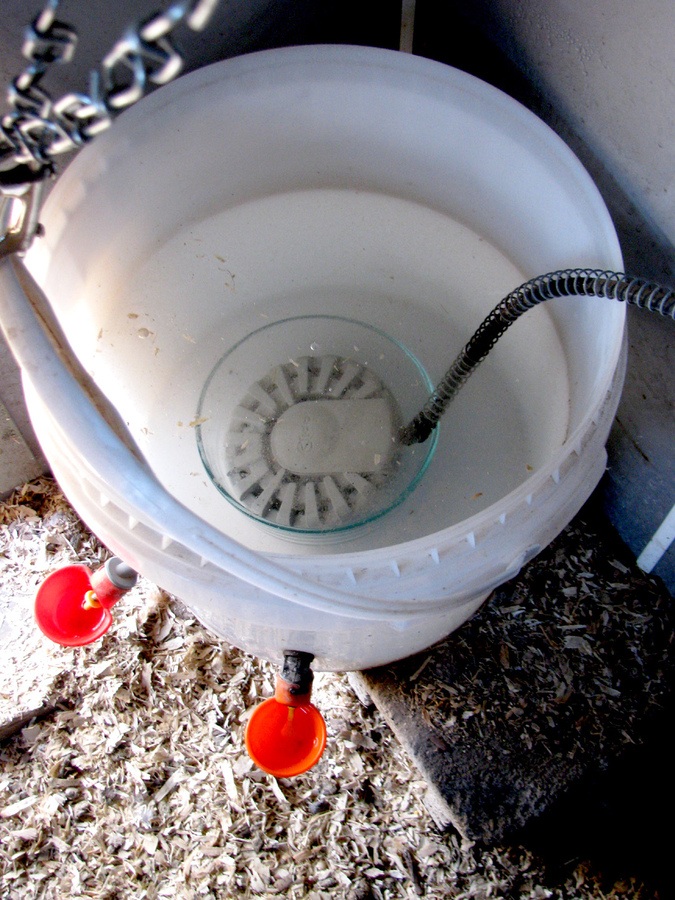
Make drill holes on the lower side of the bucket, or under the bucket giving an allowance of at least one inch from the bottom. Continue drilling the holes around the bucket factoring in the size of your birds. Tie threaded barrel of the nipple using thread tape, making sure it does not come into contact with the metal pin. Continue by screwing the nipple onto the bucket and make sure they should not be flush mounted to prevent cracking of the plastic part. Drill two in the lid to will prevent a vacuum from being created. For vertical chicken nipple, you will have to hang the container to a pole leaving the lower section of the container exposed. The height of the chicken waterer should be at the bird’s neck or shoulder level of the birds.
Additional Features
As an additional feature one can add a submersible heater when the temperature drops. Finish by filling the bucket with water and checking the breather holes then test all the nipples if they open and close appropriately. Once everything is working correctly train the birds by pressing the nipples and leaving some water on the nipple to attract the birds to it. Once they have learned, remove all water sources that may have disadvantages of water being contaminated.
One last additional step is marking mark the water level and check it after some time to monitor the amount of water they take during a specific period.
Troubleshooting
When nipples don't release water even when release pin is pressed.
Check vent hole
When vent holes are clogged, they lead to the container being vapor-locked meaning a vacuum has been created preventing the water from flowing. When cleaning the container, the vent hopes should be checked and cleaned. Bigger holes are less likely to be clogged unlike small holes but are prone to letting dirt into the container.
Check for nipple clogs
Horizontal chicken nipples rarely have clogs because they are located on the walls of the container. When using the vertical nipple and encounter such a problem, drain the water, wash the container and refill it. If it does not solve the problem unscrew the nipple and check the O-ring for any irregularity.
Bucket leaks around the nipple
There are two main reasons for this problem. The first can be when the chicken nipple was being screwed in it was over tightened which resulted in the container cracking. Another reason can be due to the container being exposed to the harsh weather condition of sunlight and cold temperature leading to the bucket cracking. This can be resolved by either sealing the crack using aquarium-grade silicone or replacing the bucket.
The hole is large or alternatively, the threads are leaking
This mistake is usually common if the bucket was drilled larger than the fitting, this is usually associated with thick containers. This problem is easily solved by tapping the wall using Teflon tape. In thinner containers repairs help for a shorter time therefore replacement is recommended.
When chicken nipples are leaking
This is a very common problem, sometimes when birds use the nipples more water is released than what the bird needs, this can result in the formation of a small puddle of water making the environment of the chicken uncomfortable. When the birds are drinking water the nipple is pressed making the O-ring to move out from the groove in the barrel, this allows water into the nipple. After the bird has finished drinking, the O-ring goes back to seal the barrel and stops the flow of water therefore to stop the leakage check the O-ring for any irregularity.
Birds refusing to drink from the nipple
This problem has several solutions to it among them;
If your birds are too young and are unable to press the nipple. It is advisable to be used for older birds than two weeks. Another problem can be a lack of training for the birds making them unaware of how the nipple functions. Also, remove the previous sources of water after training to make the birds depend on the news source.
The nipple freezing
This problem can be prevented by installing the nipple at a level to prevent the slight tilt inside the barrel threads that prevents it from self-draining. Another alternative is to add a submersible heater inside the bucket to prevent the water temperature from being too low. Some people may prefer taking their buckets indoors at night or painting it black this allows the winter sun to thaw the thin layer of ice that may form overnight.
Automatic chicken waterer with float
| Image | Product | Top rated |
Pour Spout Lid - BPA Free 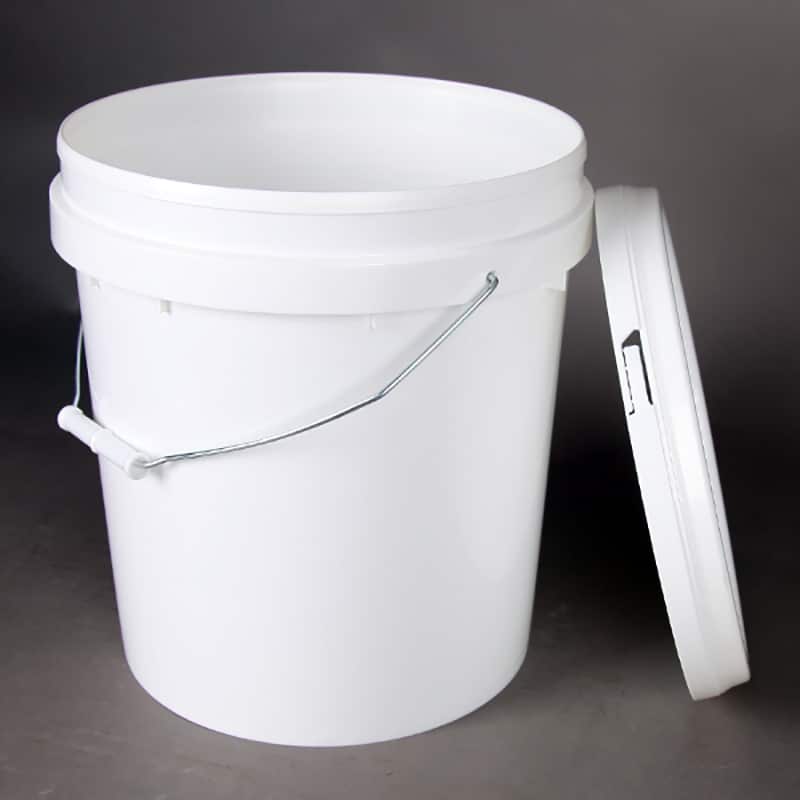 | Food Grade Plastic
| Check Price |
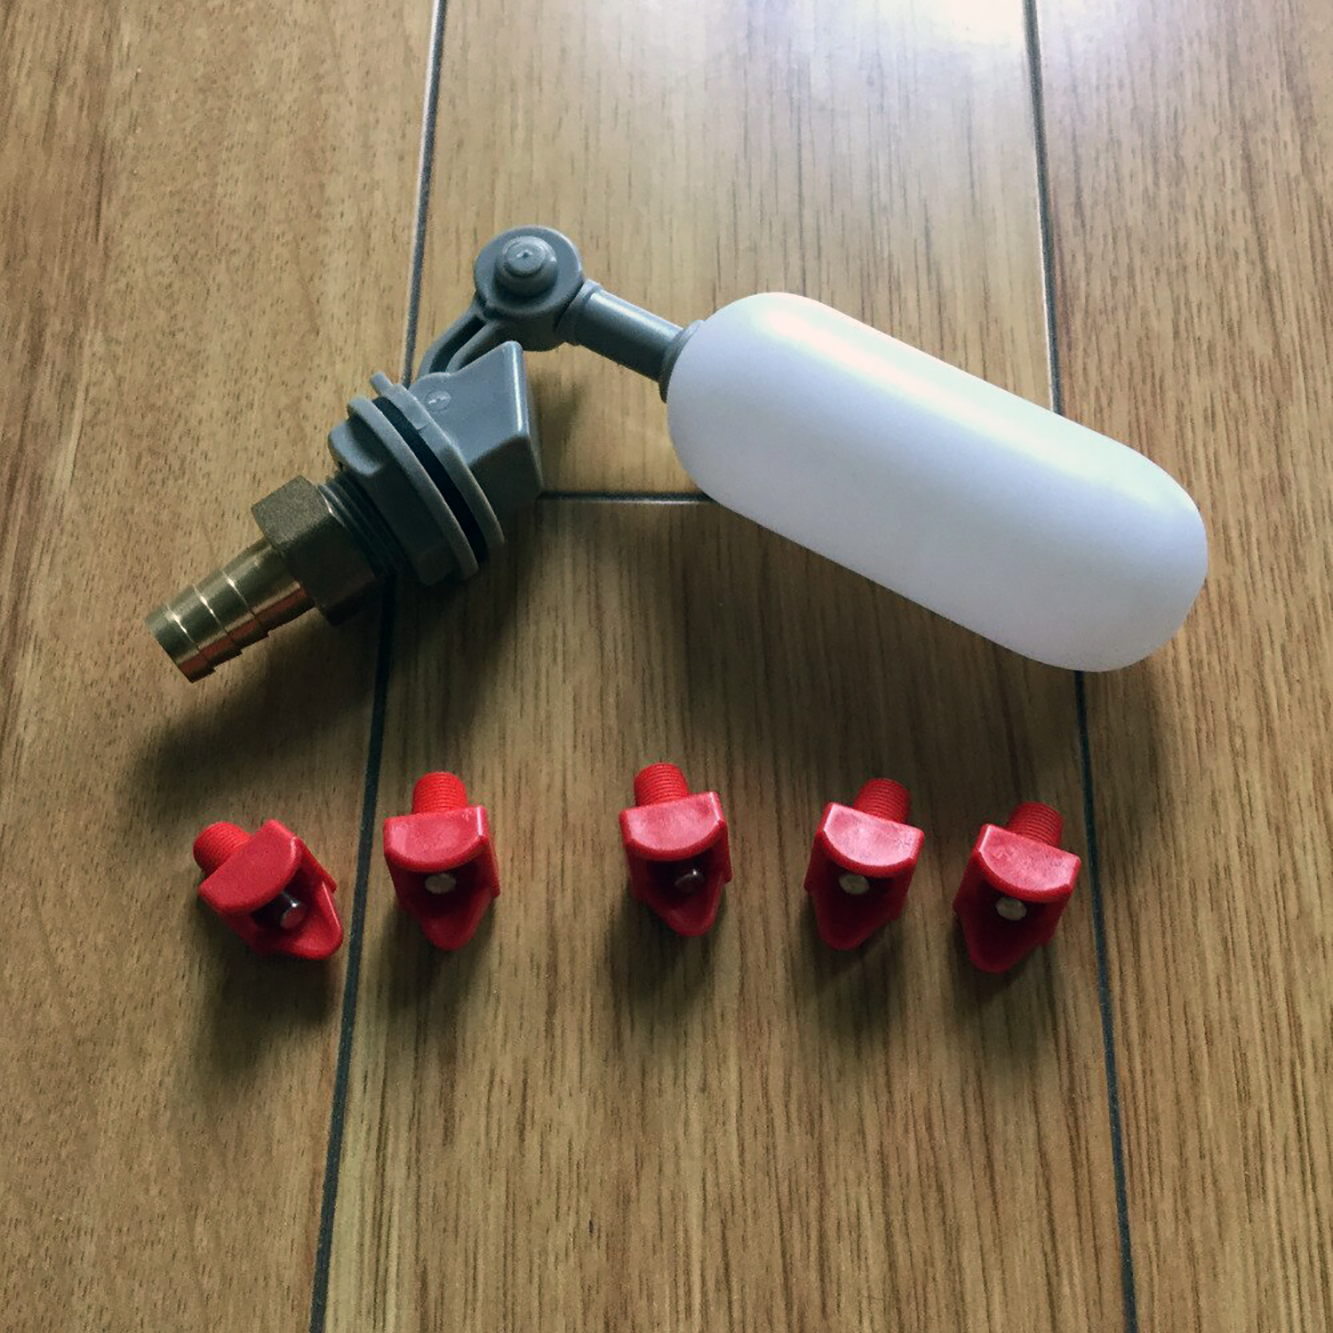
Automatic Waterer Bowl  | Float Valve for Stainless Steel Automatic Waterer
| Check Price |
12 Pack Drinker Waterer for Chicken 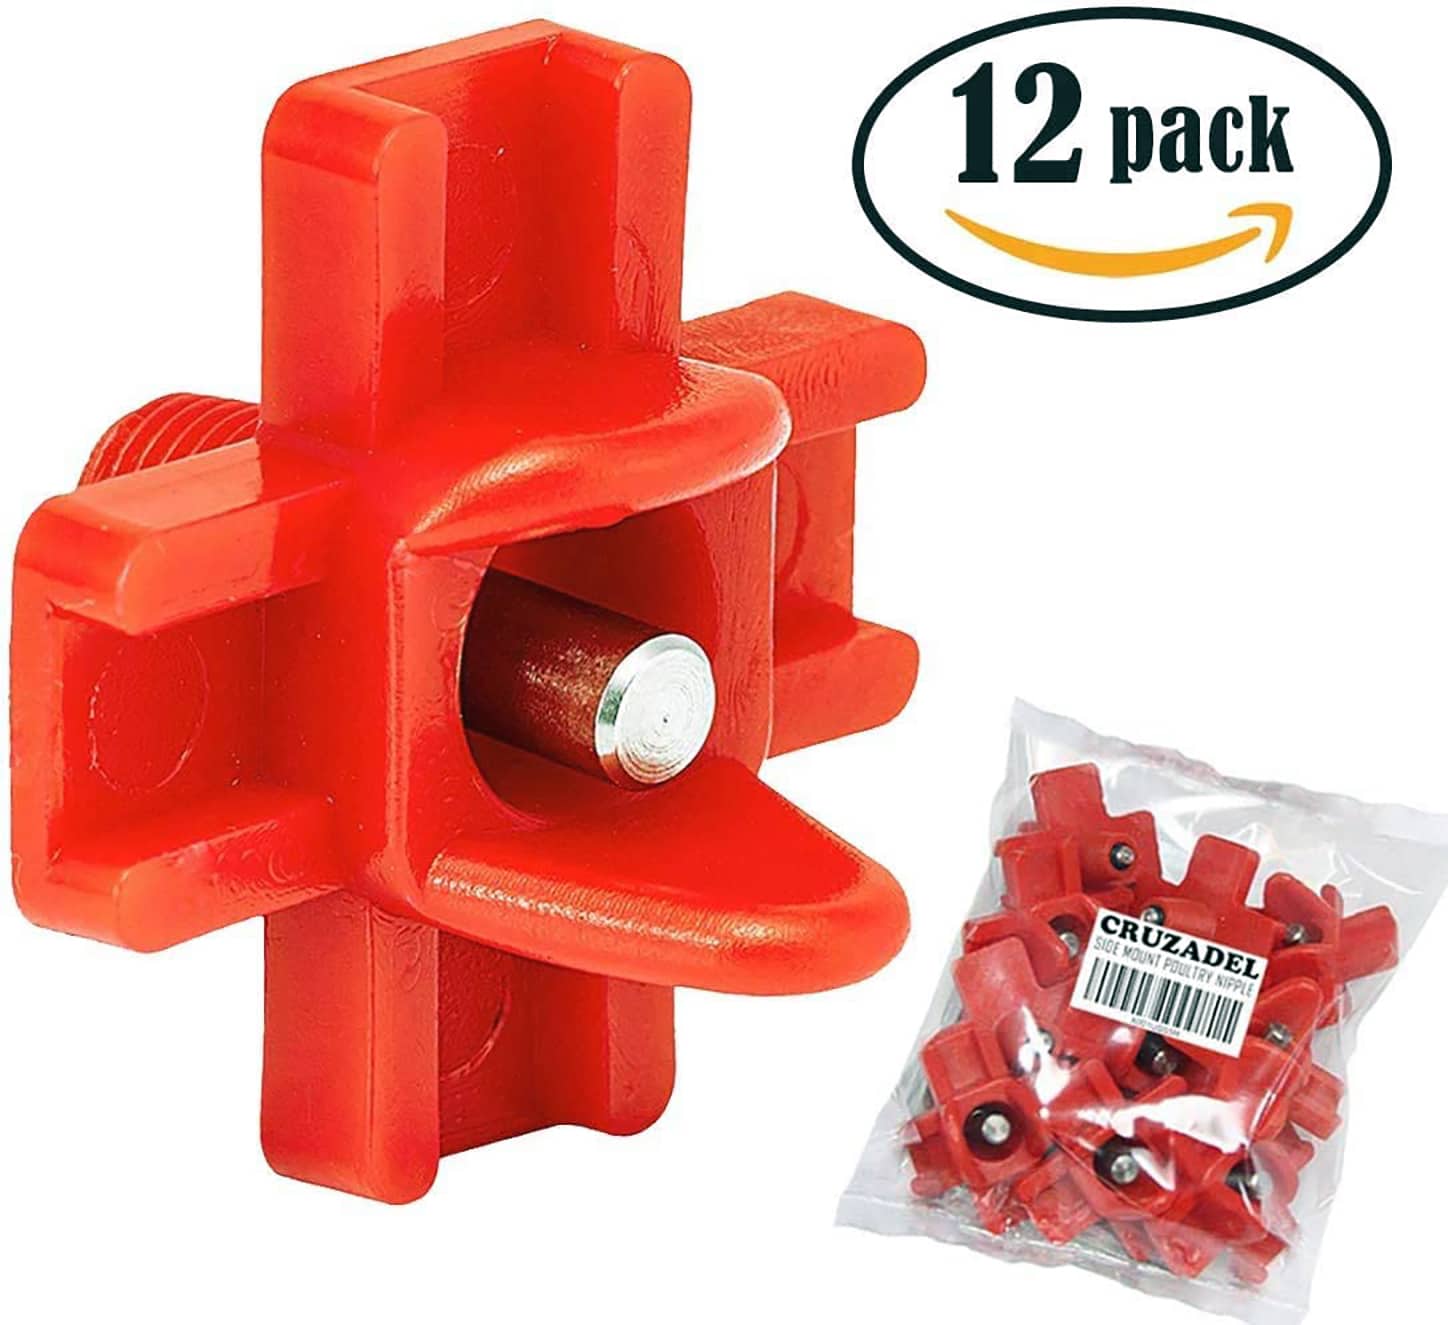 | Horizontal Side Mount Automatic Poultry Nipples
| Check Price |
RentACoop Anti-Dirt 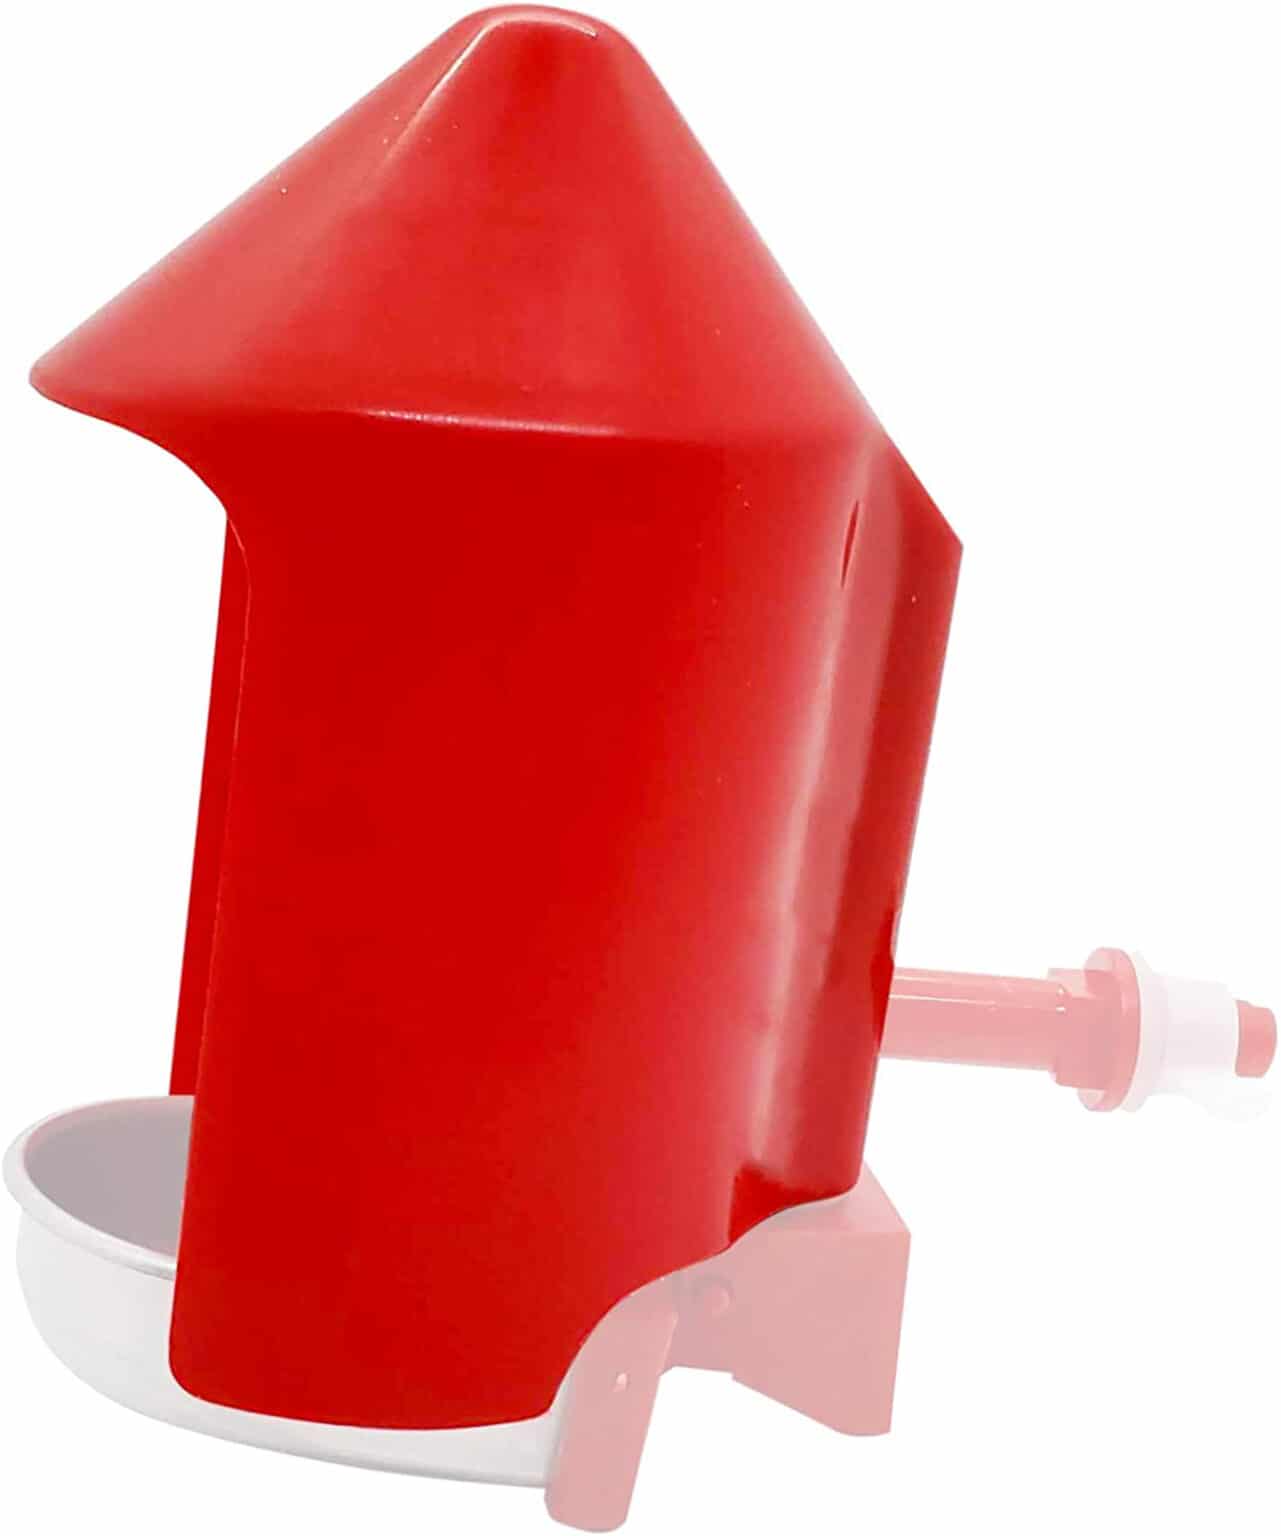 | Auto-Refil Watering Cups
| Check Price |
Farm Innovators 250w or 500w 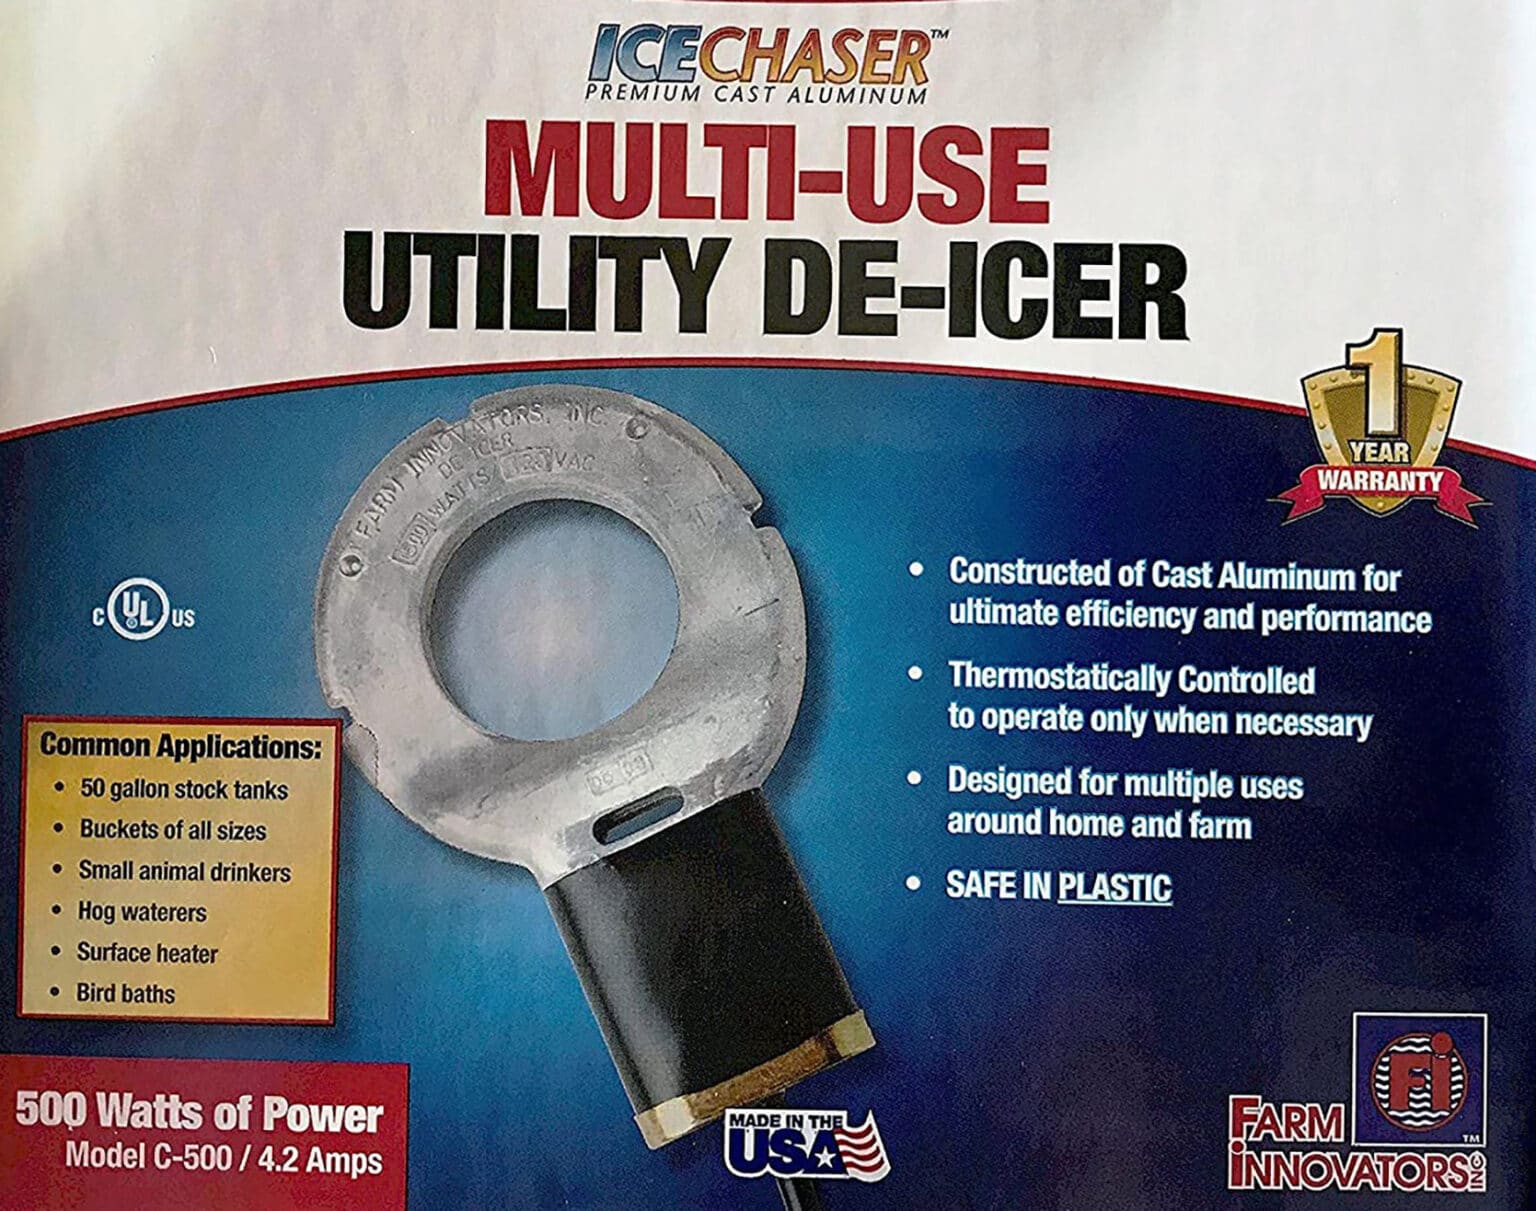 | Submergible Cast Aluminum Utility De-Icer
| Check Price |
There is always that feeling of having enough of carrying water daily for your chicken and thinking of a solution to this problem. Well, the secret is having a water system that uses a floater to fill the bucket when empty and close when full. This setup is simple to construct and requires fewer skills and money to make.
Requirements:
- Two 4-inch S&D cleanout fittings
- 4-inch S&D cap
- Three 4-inch S&D coupler
- 4-inch S&D six-foot pipe
- 4-inch S&D 6-inch pipe
- 4-inch S&D 4 inch of pipe
- Six self-tapping screws
- Three 24-inch wooden stakes
- Fluid master toilet valve
- Fluid master half-inch pipeline
- Half inch pipe garden hose
- PVC pipe glue
Installation
Start by gluing the six-inch pipe and the cap together to make the bottom cup of the floating chamber. Continue to the next step of drilling and fitting. At the bottom of the floating chamber, drill a hole for the floating valve this is after determining the appropriate position for the hole. This is easily done by smearing paint on the inlet and placing it in at an angle where the valve will be away from all of the edges. Where the hole is to be made is going to be shown by the mark of the paint in the inlet.
Continue by gluing together the cleanout fitting coupler with the 4-inch pipe. This will be used to make the cleanout for the float chamber. Proceed to glue the cleanout, cup, and tee by gluing the cleanout to the bottom cup, afterward connect the two to the tee to complete the float chamber. The next step will be on the main pipe. Cut two pieces of three-inch-wide slots leaving about 3 inches intact in the center of the main pipe which will act as support. Make sure the slot to be about two inches and 6 feet in length. Using a grinder cut the slots. Once done sand the edges of the slots using flap disks.
Move to the next procedure which is optional and involves taping and painting. If you choose to paint, start by taping the two ends of the pipe then apply the paint. Ensure the space for the float chamber is enough to enable it to go in without touching the paint earlier painted. This is important for a clean connection for gluing. Glue the main pipe to the float chamber this will make the slots to tilt slightly towards the front but not so far that the pipe will not hold much water. Proceed by cutting the clips using a grinder then smoothen the edges with the flap disk. Cut a slot in them using a grinder disk. Be cautious when cutting small slices at the start and only cut enough clips to fit around the pipe snugly.
Under the chamber, install the fluid master into the float chamber and tighten the nut. The next step is mounting the clips to the wall. Make sure it is positioned on level ground. The second last step involves mounting the waterer, connector hose, and the fill. This is done by using a toilet supply line and ½ pipe to the garden hose fitting to connect to the garden hose. Turn on the water and monitor till it starts to overflow then adjust the valve to shut off the water inlet at the right moment to prevent overflow. Allow your chicken to come and enjoy the water.
DIY Baby Chick Waterer
TO DIY a baby chick waterer, you need the following items:
- A shallow tray
- A plastic container
Step 1: Poke some holes on the container right above where you want the water level to be.
Step 2: Fill the tray with water and set it at a strategic point that is accessible to all your baby chicks.
Step 3: Fill the container with water and place it on the shallow tray.
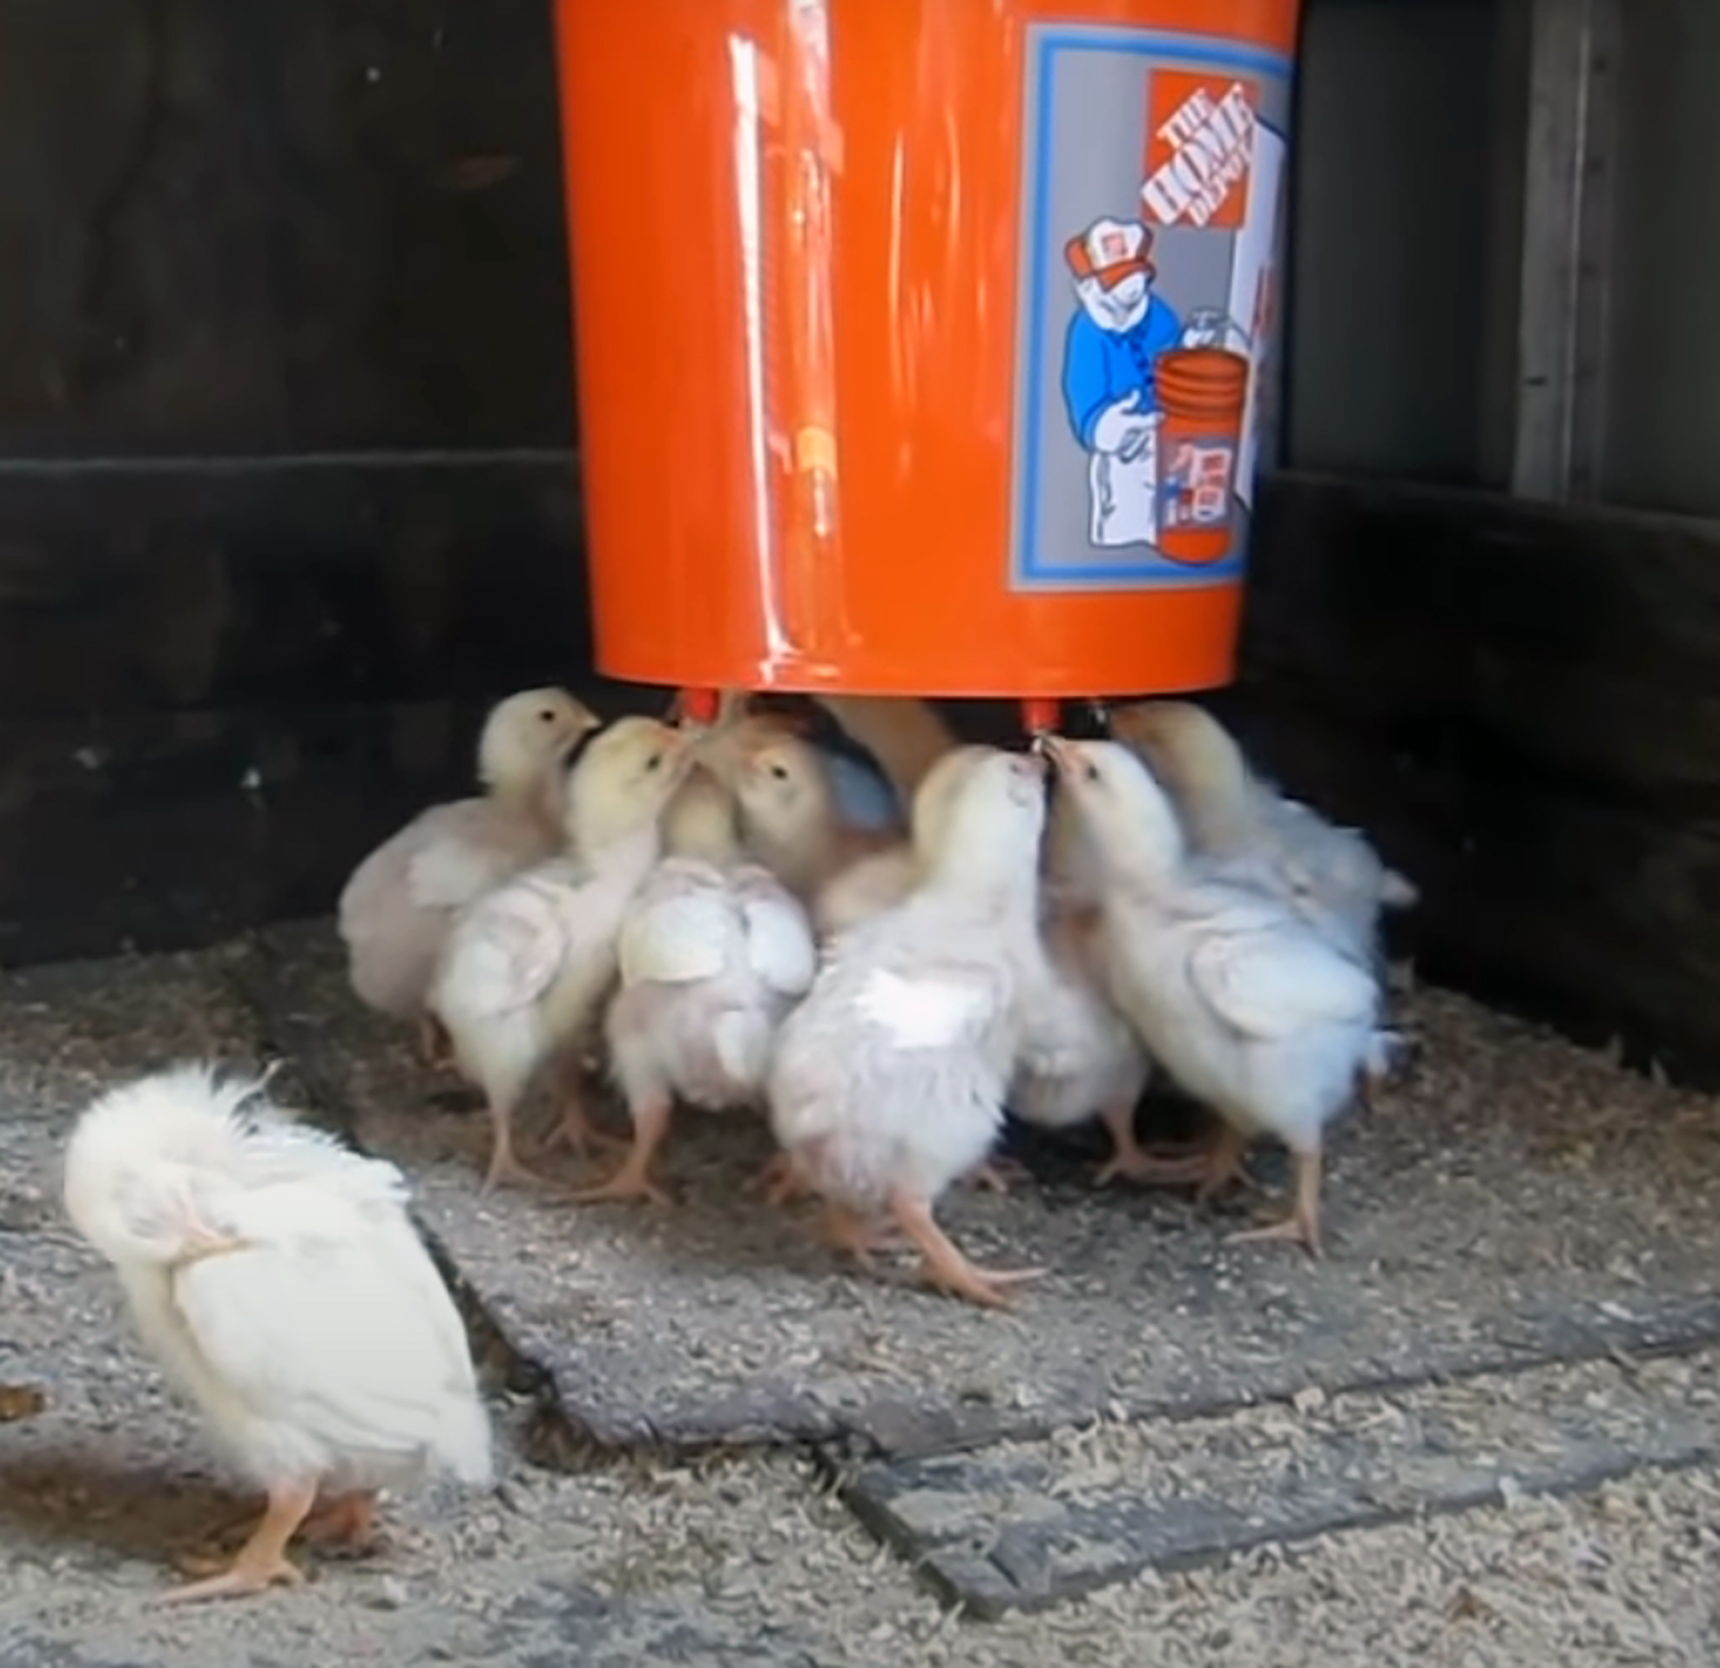
As the water on the tray runs out, the water in the container will refill the tray through the holes you poked.
This is one of the simplest DIY baby chick waterers you can make. It takes approximately five to ten minutes to make this waterer and you can use it immediately.
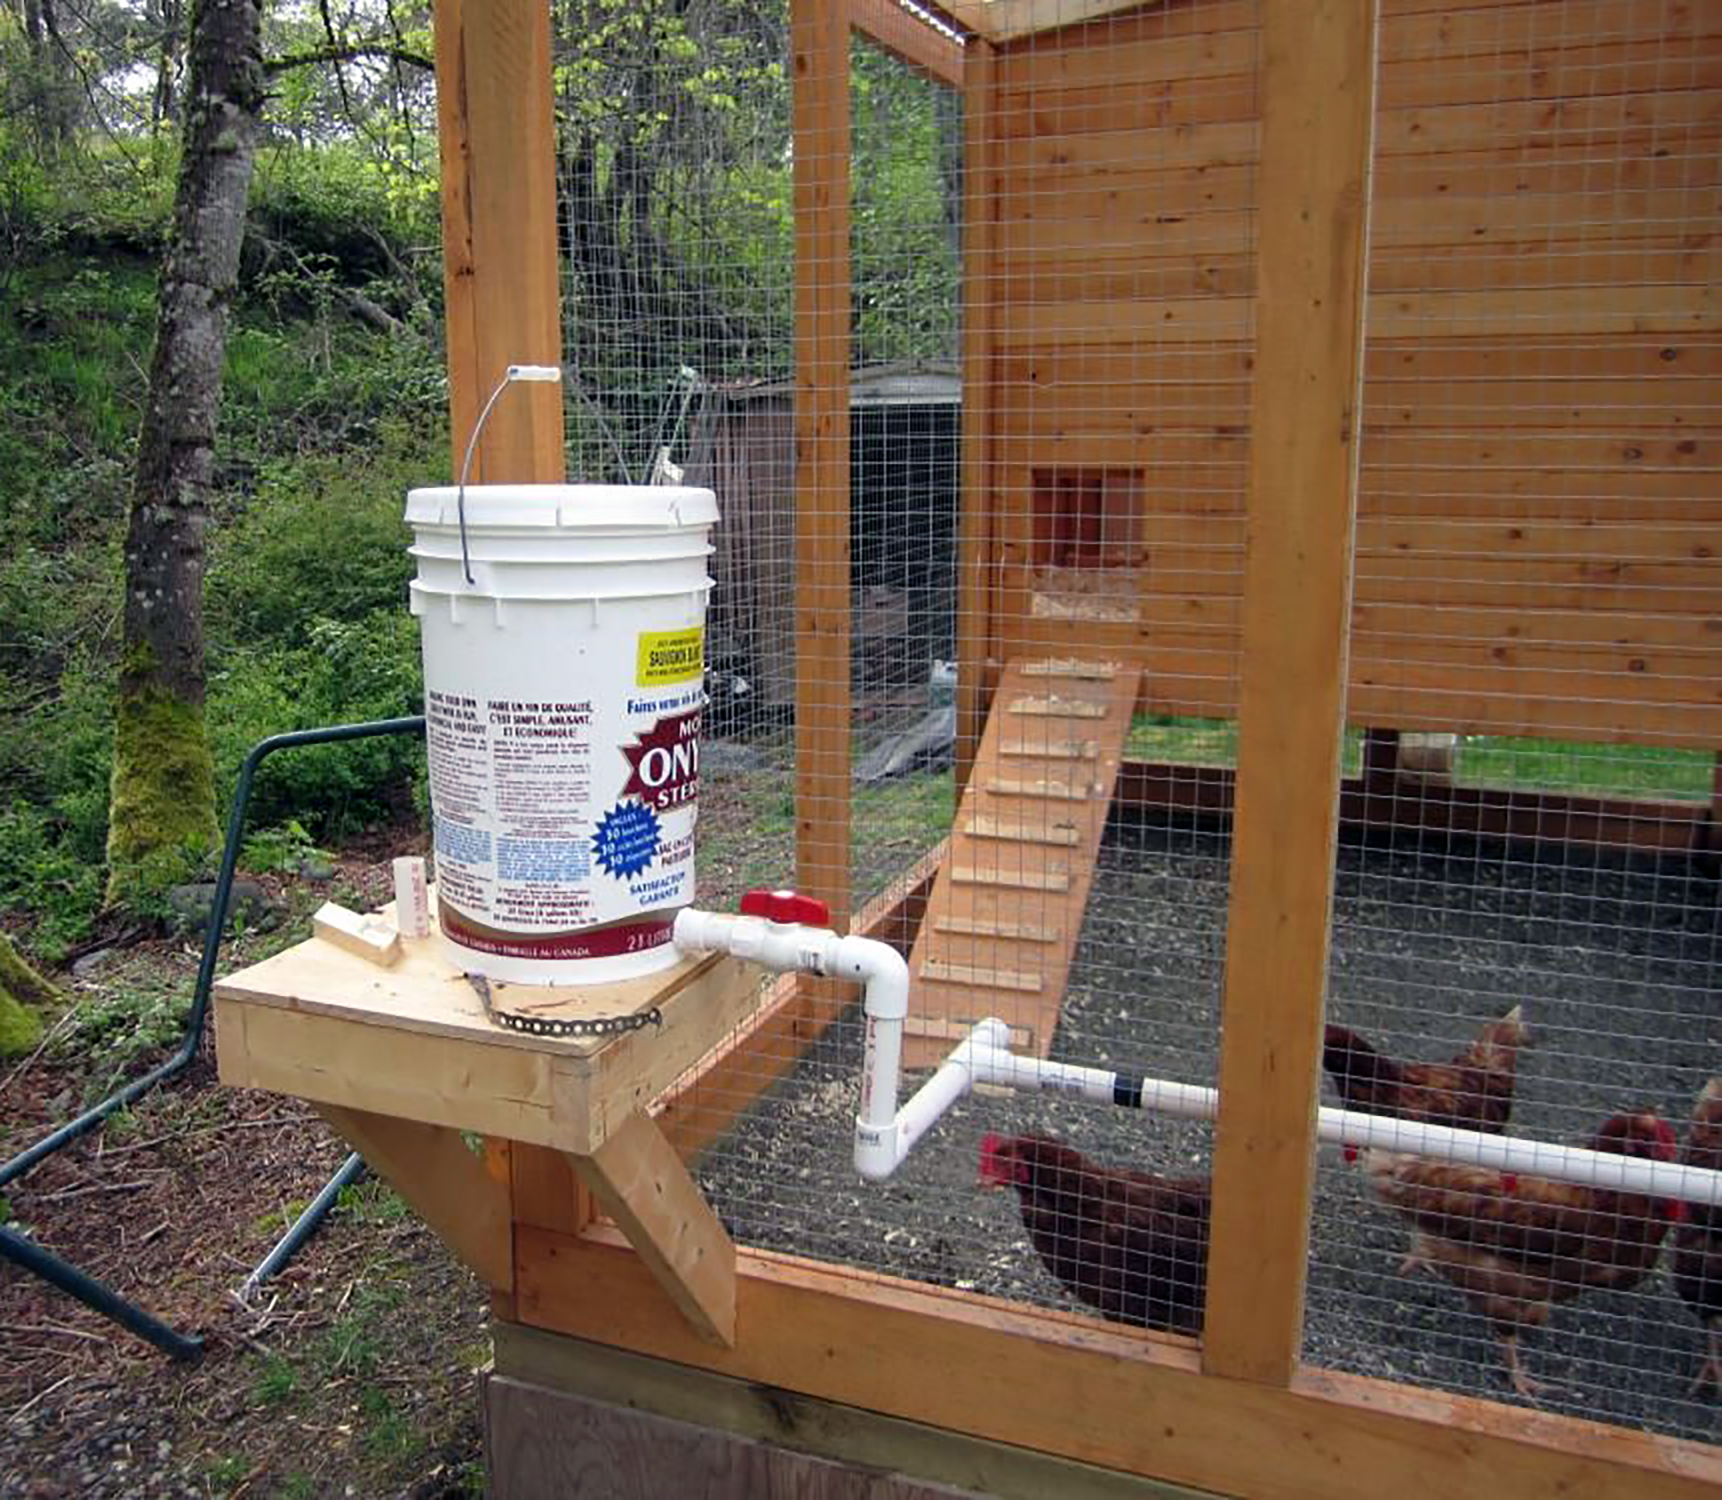
Automatic chicken watering system
This is a simple DIY to install, it requires a reservoir that will be constantly filled with water to establish the appropriate height for the cup. A five-gallon bucket is recommended for this setup because it is tall to enable the fit the fill valve and larger enough not to tip over. There should be an allowance of 3 inches between the top of the fill valve and the bottom where the arm of the valve swing to let in the water. It is important to maintain the cup at the appropriate height considering how high the chicken can drink from comfortably.
Installation
Drill a hole approximately three inches from the lid of the bucket on the sides of the container. Use a 5/8 drill bit when drilling, this will create a hole that fits the fill valve without play. Apply some thread seal to the fill valve and screw it into the drilled hole. Tighten the fill valve to the bucket tight enough.
Proceed by connecting a 5/8 hose to the threads of the fill valve, this will be the inlet source of water for the setup. Once done open the tap for the filler hose and adjust the filler valve to close at the appropriate height of water.
I hope this article was helpful in your quest for a simple and effective DIY for your chicken waterer. DO leave a comment down below if you have any concerns.
Read more from prestigequeen:
Contents